
Picture this: you’ve just ordered a beautiful radiator cover. It arrives, looks stunning, but when you try to slide it into place, it won’t fit. Maybe it’s too tight around the valves, or it wobbles against the skirting board. What should have elevated your living space instead becomes a setback, both frustrating and costly.
The consequences of poor radiator measurements are more serious than most people expect. A cover that doesn’t sit properly can be unsafe, posing a tipping hazard. Equally damaging, a tight or incorrect fit restricts airflow, slashing your heating efficiency. That means higher energy bills and money wasted. It will also come with the disappointment of a poor-looking finish.
The good news? By following a proven, step-by-step system you can guarantee a perfect fit. This guide will walk you through everything: preparation, measurement rules, pitfalls to avoid, and techniques for tricky spaces. With this knowledge, you’ll avoid costly mistakes, ensure safety, optimise heat output, and unlock the full value of your investment.

What You MUST Know Before Measuring Your Radiator
Many homeowners make the same mistake: they grab a tape measure, jot down rough dimensions, and think the job is done. Unfortunately, that approach leads straight to misfitting covers. Before you start measuring, you need to understand your radiator, choose your cover style, and gather the right tools. This preparation sets the foundation for accuracy.
Determine Your Radiator Type
Different radiator types require slightly different approaches:
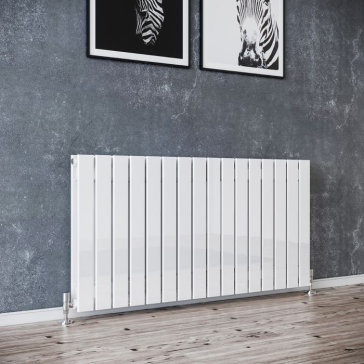
· Standard Column Radiators: Classic multi-column radiators found in many older or traditional homes. Measuring is straightforward, but clearance is vital since they protrude more.
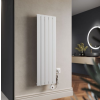
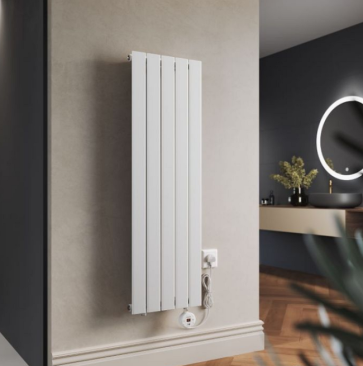
· Convector Radiators: Flat-panel radiators with fins inside. These are slimmer but often wider than columns, so width and projection must be carefully noted.
· Towel Radiators: Common in bathrooms, these often need a totally different type of cover or none at all. If you want a cover here, measuring is trickier due to the bars’ shape.
Knowing your radiator type ensures your cover is designed for it.
Decide on the Cover Style
Covers typically come in two designs:
· Flat-Top Covers: Useful if you want the top to double as a shelf. These need extra clearance above the radiator.
· Slatted-Top Covers: Designed for better heat flow, particularly useful in living rooms or bedrooms where warmth matters.
The cover style changes your height calculations, so make this decision first.
Gather Your Tools
The tools you choose matter more than you think. A flimsy cloth tape won’t cut it here.
· Use a metal tape measure for precision and rigidity.
· Keep pen and paper, or record digitally, so you don’t rely on memory.
· If available, a spirit level helps confirm whether your walls and floors are plumb and level. Most aren’t, so this tool can reveal hidden problems.
The Only Tools You Need for Perfect Radiator Cover Measurements
You don’t need a workshop full of gadgets. Just these essential tools:
Metal Tape Measure
Your most important tool is a metal tape measure. Unlike cloth or flexible plastic tapes, a rigid metal tape stays straight, ensuring you capture exact dimensions every time. This prevents sagging or warping of the measurement and guarantees accuracy when noting widths, heights, and depths. A small slip with the wrong tape often leads to ill-fitting covers.
Notepad and Pen
Always have a notepad and pen beside you. Trying to remember three sets of numbers such as width, height, and projection almost always results in confusion. A quick sketch of your radiator with notes marked down adds clarity and avoids mistakes. Writing things down twice gives an extra layer of security.
Spirit Level (Optional)
A spirit level isn’t essential but can save problems later. Walls are rarely perfectly plumb, and floors often aren’t level. Checking this early means you’ll know if your cover needs a little clearance to sit securely and evenly.
The Golden Rules of Measuring for a Radiator Cover
Before diving into detailed steps, commit these principles to memory:
· Measure in Millimetres (mm): Always. Millimetres remove ambiguity.
· Measure Twice, Order Once: Repetition eliminates errors.
· Account for Skirting Boards: Covers won’t always sit flush against them.
· Consider Pipework: Valves, connectors, and thermostats often extend further than the radiator body.
· Check if Walls and Floors Are Level: Even new homes have imperfections, compensate when recording.
These rules alone could save you from the most common costly errors.

Step 1 – How to Measure Radiator Cover Width Correctly
The first critical dimension is the width. This isn’t just the width of the radiator panels. It’s the entire span, including valves, knobs, or any protrusions.
Step-by-Step Instructions
1. Take your tape measure and record the absolute widest point of the radiator. This likely includes the valves sticking out on either end.
2. Write down this figure in millimetres.
3. Add your clearance gap. A safe allowance is:
25-50mm per side
This allows airflow and prevents the cover pressing against the valves.
Formula for Width:
Cover Width = Radiator Width + Clearance Gap on Both Sides
Let’s take a look at an example:
· Radiator = 600mm wide
· Clearance = 50mm per side
· Cover Width = 700mm
Costly Mistake to Avoid
If you order the cover to the exact radiator width, it may not fit. Worse, it could press against valves, causing leaks.
Step 2 – How to Measure Radiator Cover Height Without Error
Height catches homeowners off guard more often than width. Why? Because skirting boards and clearance gaps complicate measurements.
Measuring from the Floor Up
1. Measure from the floor to the top of the radiator.
2. Account for a 25mm or more top clearance.
3. If your cover sits in front of a skirting board, subtract its height.
Formula for Height
Cover Height = (Radiator Height From Floor) + (Top Clearance) - (Skirting Board Height)
Let’s take an examples for this scenario as well:
· Radiator = 800mm
· Top clearance = 30mm
· Skirting board = 100mm
· Cover Height = 730mm
Costly Mistake to Avoid
Forgetting the skirting board leads to unstable covers. They often rock forward or tilt. This is unsafe and unsightly.
Step 3 – Measuring Radiator Cover Projection (Depth) for Optimal Heat Flow
Projection means how far the radiator sticks into the room. This is the dimension that affects heating efficiency most directly.
Step-by-Step Instructions
1. Place the tape at the wall, measuring to the farthest front point, often the valve head.
2. Note the reading.
3. Add your clearance. For projection, this must be larger than for width:
· 75-100mm clearance is standard.
Formula for Projection
Cover Depth = Radiator Depth + Clearance Gap
Here’s an example to help you understand better:
· Radiator = 150mm depth
· Clearance = 100mm
· Cover Depth = 250mm
Costly Mistake to Avoid
Too little clearance means blocked convection currents your room takes longer to heat, and the cover risks overheating. Some cases even pose a fire hazard.
Step 4 – Recording Your Radiator Cover Measurements Like a Pro
Now you’ve measured width, height, and depth. The final step is to record and cross-check.
· Draw a simple rectangle sketch.
· Mark W, H, D clearly with their respective numbers.
· Double-check each figure at least once.
· If in doubt, measure a third time.
This habit is common among carpenters. It eliminates almost all ordering errors.
Beyond the Basics – Special Radiator Cover Measuring Scenarios
Not every radiator sits in a neat, flat-walled living room. Let’s deal with the trickier cases.
Radiators in Bay Windows
Here, a straight cover won’t do. Measure the front chord (the straight width across the bay opening). Then separately note the angles from walls to chord. Specialist covers can then be made to match.
Radiators with TRVs
TRVs (Thermostatic Radiator Valves) stick out further than standard valves. Always measure from the wall to the tip of the TRV head for projection.
Uneven Floors or Walls
If your wall bows or your floor dips, take three measurements: left, centre, right. Record the largest figure to ensure clearance.
Recessed Radiators
If your radiator sits in a niche, measure width, height, and depth of the niche itself too. Covers here often need custom trimming.
Conclusion: Measure with Confidence
Accurate radiator cover measurements are not optional. They’re the difference between a safe, efficient heating system and an expensive, unusable cover.
You need to prepare first. Identify radiator type and cover style and gather tools. Make sure to follow the golden rules while you are taking measurements as well. For example, measurements should be millimeters, and you need to take measurements twice. On top of that, measure width, height, and projection step by step. You can also record your results to verify accuracy. For special cases like bay windows or TRVs, take adapted measurements.
By investing a small amount of care now, you avoid wasted money and heating inefficiency. More importantly, you’ll enjoy a secure, attractive radiator cover that enhances both your home’s safety and style.
Now you’re equipped with the knowledge. With that in mind, grab that tape measure and get started! For professional radiator cover solutions, visit Elegant Showers UK Online Shop where expert consultants can guide you further.


Validate your login