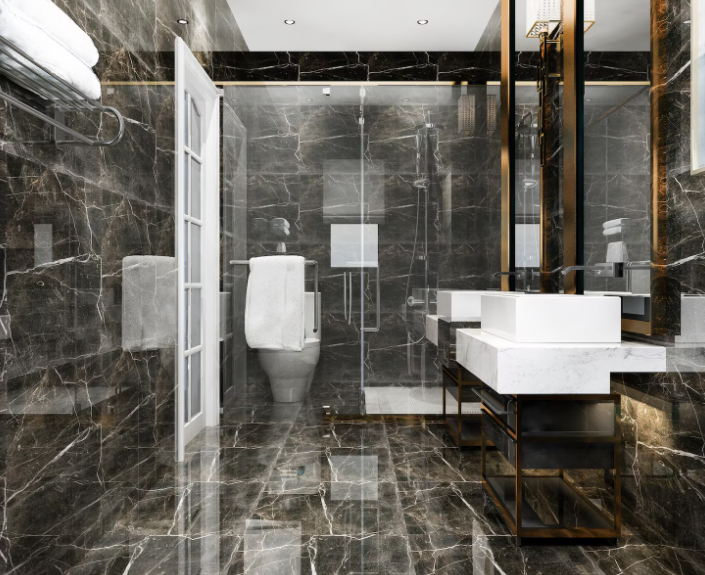
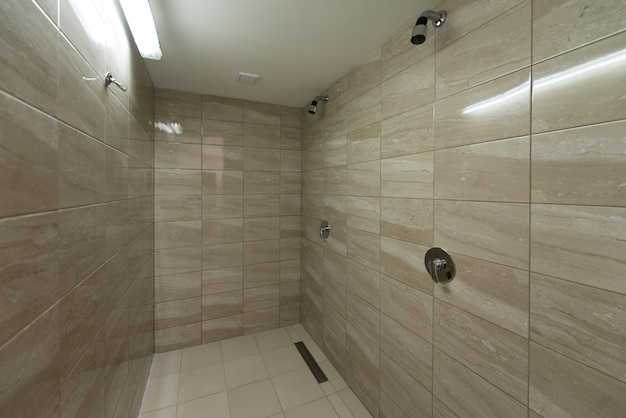
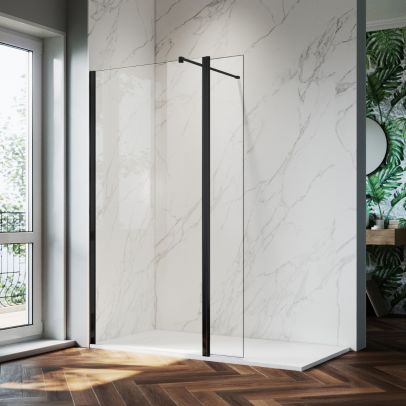
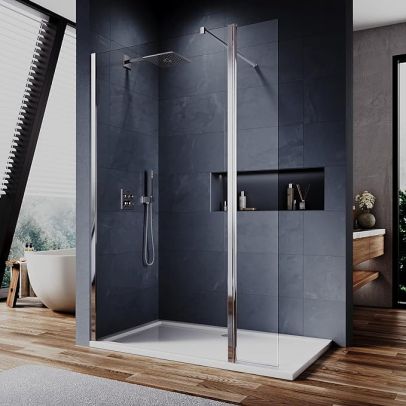
There’s something undeniably stylish about a modern wet room. With its sleek lines, minimal design, and seamless floor-to-wall look, it embodies sophistication and luxury. From boutique hotels to glossy online design magazines, wet rooms are celebrated for their open-plan feel and effortless elegance. They suit both large family bathrooms and compact en-suites, instantly adding value to a property.
However, while the style is popular, reality sets in when homeowners discover the true cost of building one. The main issue is not the aesthetics, it’s the price tag. A fully tanked and tiled wet room floor requires specialist skills, high-quality materials, and time-consuming preparation. Predictably, this drives costs sky-high, making many budget-conscious homeowners pause.
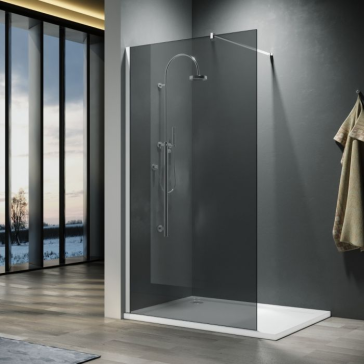
The good news? You don’t need to abandon your dream bathroom. With careful planning, you can create a beautiful wet room effect without paying premium-level installation prices. The secret is swapping the traditional “fully tiled floor” approach with a low-profile pre-formed shower tray (also called a wet room former). Pair this with tiled walls, and you achieve the same seamless, high-end illusion at a fraction of the price.
In this article, we will:
· Define what a wet room really is and why waterproofing matters.
· Explain why a fully tiled wet room floor commands such a high cost.
· Introduce the smarter budget solution: pre-formed shower trays.
· Show you how to choose the right tray for your bathroom.
· Compare real cost savings between traditional and budget-friendly methods.
By the end, you’ll be ready to plan a wet room that feels luxurious without draining your wallet.
What is a Wet Room? Understanding the Core Principles
Before we explore costs and alternatives, it’s important to understand what actually defines a wet room. At its core, a wet room is a fully waterproofed bathroom where the shower space is level with the surrounding floor. Instead of being limited by a bulky shower enclosure or raised tray, the entire floor acts as a showering area.
The key components are:
1. Waterproofing (Tanking)
No wet room can function without proper tanking. Tanking means creating a completely watertight barrier beneath the visible finishes. Without it, moisture can seep into walls or floors, leading to leaks, structural damage, and mould. Even when you use a pre-formed tray, all adjoining walls and nearby floor areas still need tanking for long-lasting protection.
2. Sloped Floor (Falls)
wet room relies on a carefully sloped gradient that allows water to flow directly into the drain. In traditional wet rooms, this slope is created manually with a cement-based screed. In budget-friendly setups, the gradient is built into the tray itself, removing the need for intricate floorwork.
3. Drain and Outlet Options
Wet rooms require discreet yet effective drainage. Most homeowners choose between square and linear drains. Square drains are practical and compact, while linear drains are sleek and modern, often running flush along one side. Regardless of style, the drain works in tandem with the floor slope to remove water efficiently.
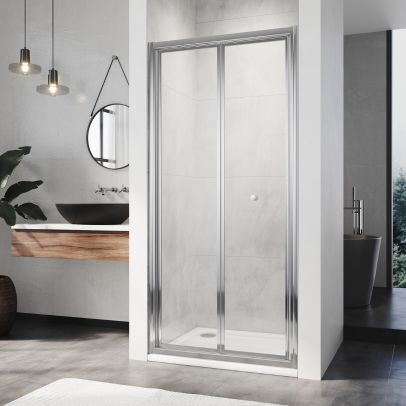
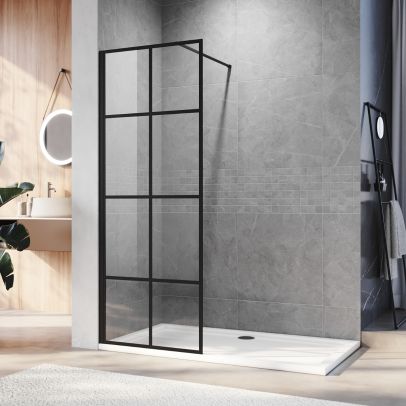
In contrast, a traditional shower enclosure contains water within a tray rim and glass walls. While it’s functional, it sacrifices the open-plan luxury a wet room offers. This distinction, combined with stylish appeal, is why wet rooms remain highly desirable despite higher costs.
The High Cost of a Fully Tiled Wet Room Floor: Labour, Materials, and Complexity
The biggest obstacle to creating a wet room isn’t design, it’s expense. Why does tiling the entire bathroom floor push costs so high? Several reasons stack up:
1. Labour-Intensive Installation
Achieving the perfect water-draining slope is not simple. It requires experienced tradespeople to lay a cement screed with precise falls toward the drain. This is a highly skilled job, and skilled labour always comes with a hefty price tag.
2. Specialist Materials
A fully tiled wet room needs more than just tiles. You also require tanking kits, decoupling membranes, adhesive, grout, sealants, and waterproof primers. Each component adds cost, particularly if you are covering a large surface area.
3. Material Waste
Because the floor must be sloped in multiple directions, tiles often require cutting, leading to excess wastage. Uneven cuts mean more tiles are purchased than square footage alone suggests.
4. Time and Drying Stages
Wet room floors cannot be rushed. Screeds require drying time, tanking layers need curing, and adhesives and grouts have specific setting periods. Add it all up, and the entire process stretches across days or weeks, inflating labour bills further.
Put simply, a tiled wet room floor is labour-heavy, time-consuming, and material-tight. For many homeowners, this makes the idea feel out of reach. But luckily, there’s a clever compromise.
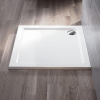
The Budget Wet Room Hero: Using a Low-Profile Pre-Formed Shower Tray
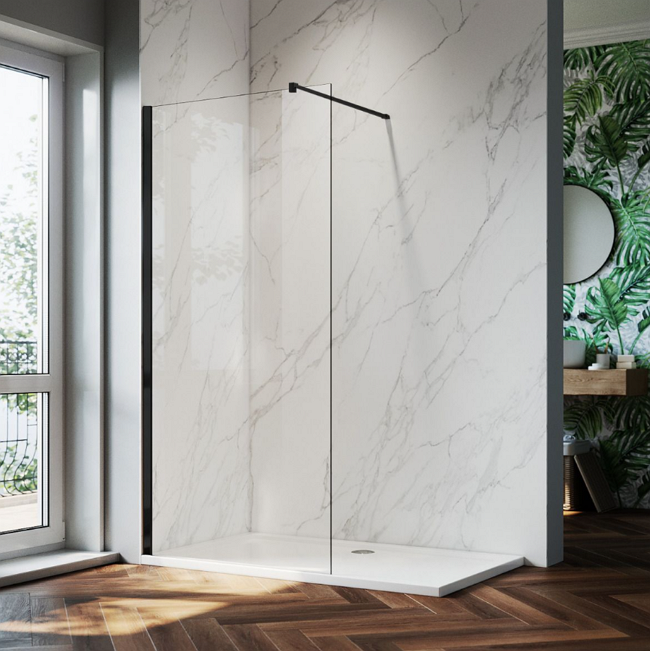
Here’s where things get exciting: enter the low-profile pre-formed shower tray, often referred to as a “wet room former.” This product replicates the luxurious flush-floor look of a high-end wet room without the installation complexities.
How does it solve the problem?
1. Integrated Slope
The tray already includes a pre-moulded gradient that guides water toward the drain. This means you no longer need a specialist screed layer; you simply install the tray, tank the area, and tile around it.
2. Low-Profile Design
Modern trays are ultra-slim, with heights ranging from 20mm to 40mm, creating a nearly level walk-in shower effect. Once tiled up to the tray’s edge, the transition is visually seamless.
3. Material Options
· Stone Resin: Dense, solid, premium feeling, though slightly heavier and more expensive.
· Acrylic: Lightweight, affordable, and easy to fit, a good balance for budget-friendly projects.
· High-Impact PVC/ABS: The cheapest option, durable yet lightweight; ideal for tight budgets.
4. Built-In Upstand
Many trays include a small upstand (50-100mm) along the edges. This invisible lip allows wall tiles to be fixed securely over the joint, ensuring waterproofing and delivering the illusion of a continuous floor.
When installed correctly, a pre-formed wet room tray looks almost identical to a fully tiled wet room, except it cost a fraction of the time, effort, and money.
How to Choose the Best Pre-Formed Shower Tray for Your Budget Wet Room
With so many products on the market, how do you select the right one for your project? Here’s what you need to consider:
1. Size and Shape
· Square/Rectangular: The most straightforward and usually cheapest.
· Quadrant (curved): Good for corner spaces or smaller bathrooms.
Larger sizes cost more, so always measure carefully to avoid unnecessary expense.
2. Profile Height
Choose the lowest possible profile (20mm–40mm) for authentic wet room style. Higher profiles are less sleek and make the design appear more traditional.
3. Materials
· Stone Resin: Long-lasting and luxurious but comes with a higher price.
· Acrylic: Excellent balance of strength and affordability.
· PVC/ABS: Best for small budgets where weight and strength demands are lower.
4. Drain Compatibility
Ensure your tray matches your chosen drain type, either a central waste or a stylish linear drain. Some products come as a full kit, which makes installation easier.
5. Load-Bearing Capacity
If you’re fitting a tray upstairs, double-check it can support weight without bending. Stone resin scores highly here, while thinner acrylic or PVC requires more reinforcement.
6. Brand Reliability
Well-known UK brands frequently recommended by tradespeople include Mira, Impey, and Kudos. While you shouldn’t pay over the odds for branding, choosing a tried-and-tested manufacturer often ensures better quality guarantees and water-tight instructions.
Wet Room Cost Breakdown: Budget Tray vs. Fully Tiled Floor
To show the savings clearly, let’s compare a small 2m x 2m wet room build in the UK.
Option 1: Fully Tiled Wet Room Floor
· Labour for screed slope: £800–£1,200
· Tanking system: £200–£400
· Tiles, adhesive, grout (floor only): £600–£1,000
· Waste materials and cutting: £150
· Total: Around £1,800–£2,700
Option 2: Wet Room with Low-Profile Tray
· Tray (depending on size/material): £300–£700
· Tanking kit (walls + adjacent): £200–£400
· Wall tiles, adhesive, grout: £600–£1,000
· Labour (simpler, less time): £500–£800
· Total: Around £1,600–£2,000
Estimated Saving: 30%–50% on the floor build. Over the entire project, that translates to hundreds (if not thousands) of pounds saved, without compromising on waterproofing or style.
Conclusion: Your Dream Wet Room is Within Reach
Creating a sleek, hotel-inspired wet room no longer needs to feel like a luxury reserved for big spenders. While a fully tiled wet room floor has long been the ideal, it comes at a cost that many homeowners find difficult to justify.
By choosing a low-profile pre-formed shower tray, you eliminate the most expensive labour and material elements but still end up with a design that looks 95% the same as the luxury option. You’ll still enjoy the flush flooring effect, the minimalist open-plan feel, and a bathroom that elevates your home’s value. This is all while keeping more cash in your pocket.
The trick is simple: invest in quality waterproofing, select the right tray for your budget and bathroom size, and plan carefully before installation. Once done, you’ll have a space that feels indulgent, durable, and modern.
Your dream wet room, in other words, is absolutely achievable, without overspending. For more tailored solutions, visit Elegant Showers UK, where professional consultants can guide you through the best wet room tray options for your home.


Validate your login