


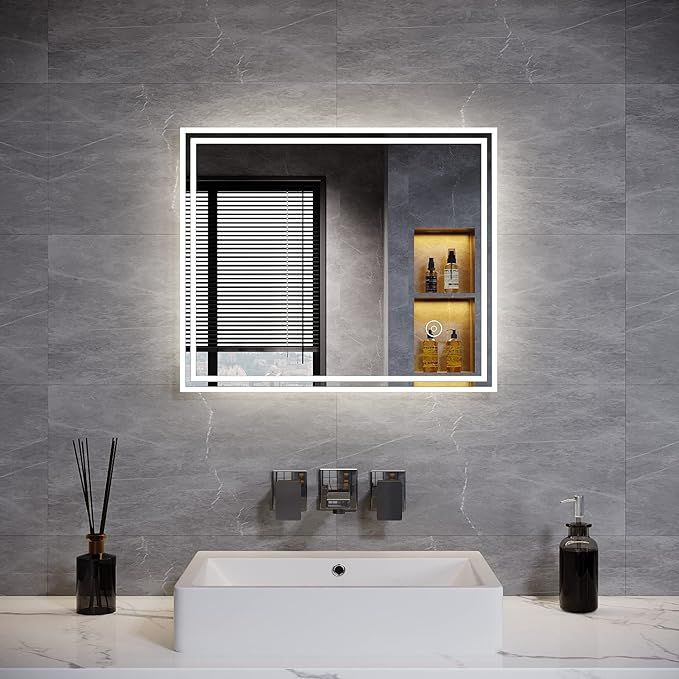
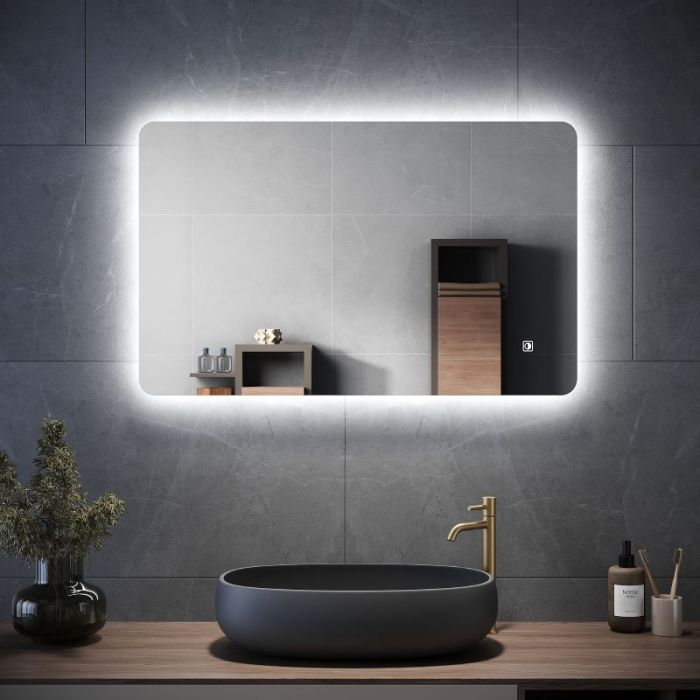
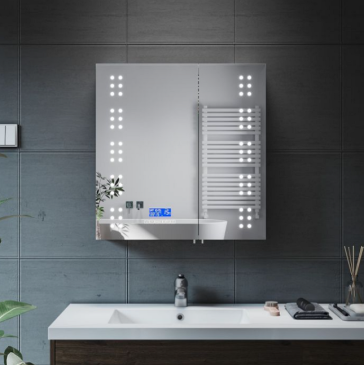
Are you looking forward to transforming your bathroom with a sleek wall-mounted vanity mirror with lights? Illuminated mirrors not only provide task lighting for shaving and makeup application but add contemporary style to any residential or hotel bathroom. However, improper installation poses safety issues with electrics and water—this is where UK wiring standards come in.
From identifying studs in plasterboard versus masonry to following Part P regulations, this guide breaks down safe DIY vanity mirror installation for the most common UK wall types. With the right tools and materials, you can achieve a professional finish that withstands moisture and brings hotel-style luxury to your home bathroom.
Essential Tools for Installing a Bathroom Vanity Mirror with Lights
Tere are some essential tools that you need to have before you proceed with installing a bathroom mirror with lights. Read on and let’s go through the list.
Tools:
· Stud finder
· Voltage tester
· Spirit level
· Hammer drill (for solid walls)
· Screwdrivers
· Wire strippers
· Cable clips
· Safety goggles (GSE/ALI approved)
Materials:
· Mirror mounting kit
· Wall plugs (red for plasterboard, brown for brick)
· Electrical connectors
· Silicone sealant (bathroom grade)
For UK installations:
· Opt for 230V-compatible tools
· Use IP44 splash-proof rated mirrors in zones 1 & 2
· 1.5mm2 twin & earth cabling
Pro tip: Purchase self-adhesive cable trunking to neatly run the power cable behind the mirror and avoid exposed trailing wires.
Safe Wiring for UK Bathroom Lighting: Part P Compliance
Since you are going ahead with a DIY project, it is important to be mindful about your safety. Read on and let’s learn more on how to ensure safe wiring for vanity mirror lights UK.
Turn off mains power at the consumer unit before beginning any electrical work. Double check circuits with a voltage tester before handling wires.
UK legal requirements: DIY electrical work in bathrooms or wet zones requires certification to prove compliance with Part P regulations. If you are not Part P certified, you must hire a qualified electrician.
However, simple installations like connecting a mirror's power cable to an existing bathroom lighting circuit (via a pattress box) fall under "competent person" rules. This allows basic mirror wiring without certification.
Safety is still paramount:
· Use IP44 splash-proof mirrors in zones 1&2 (within 60cm radius of sinks/tubs).
· All connections must be made inside an enclosure (pattress box) then sealed with silicone.
· Never wire directly into sockets—the lighting circuit offers safer, permanent power.
How to Find Studs in UK Walls for Mirror Mounting
When it comes to buying wall studs, you will have quite a few options available to consider. Let’s learn how to pick the best option out of them.
Studs provide anchor points for mounting heavy mirrors but locating them differs for plasterboard versus masonry walls:
Plasterboard Walls:
Use a magnetic or electronic stud finder. Move slowly across the wall to detect nails/screws identifying stud edges. Confirm with gentle tapping—hollow sound indicates voids behind plasterboard. Mark stud centers with masking tape.
Solid Masonry Walls:
As bricks or blocks support the weight, studs are rarely present. To confirm, use a masonry drill bit to penetrate just over an inch into the wall. Absence of a cavity confirms solid construction.
Alternatives:
For weight distribution, use hollow-wall anchors (plasterboard) or solid wall plugs (masonry) to mount across multiple points. Alternatively, construct a wooden frame as a mounting base.
Tip: Entry-level electronic stud finders struggle with solid walls. For heavy mirrors, locate joints via tapping then reinforce across two blocks.
Step-by-Step Installation Guide for Wall-Mounted Vanity Mirrors with Lights
Now you know how to be ready for wall-mounted vanity mirror installation. With that in mind, read this step by step guide to discover more on how to proceed.
Preparing Your Bathroom for Vanity Mirror Installation
First, clear towels, containers and any obstructions from the mounting area. Measure your desired installation height—around 150-160cm or eye level works best for everyday use. Account for tall/short household members. Mark drill points lightly in pencil at stud or anchor locations.
Safe Wiring Setup for UK Vanity Mirror Lights
Ideally, connect your mirror to an existing bathroom lighting circuit via a pattress box (enclosed junction box). Shut off mains power and use a voltage tester before accessing wires.
Run 1.5mm2 twin & earth power cable down to a suitable pattress box located behind the planned mirror site. Cut an access hole in the plasterboard if necessary. Connect the live, neutral and earth using terminal blocks inside the pattress box. Seal all rear connections with bathroom-grade silicone.
For safety, power cables should not trail exposed. Secure along edges with small cable clips or self-adhesive trunking behind the mirror.
Never wire directly into a bathroom socket. Lighting circuits are safer and avoid broken connections from plug movement long-term.
Installing a Vanity Mirror on Plasterboard Walls
On stud walls, distribute hollow-wall anchors evenly across stud markings to support the mirror's hanging bracket. Toggle bolt anchors provide stronger plasterboard retention for heavy mirrors.
Pre-drill clearance holes through the plasterboard (no deeper to avoid pipes!). Twist in anchors until the toggle releases and rotates flat behind the wall.
If mounting between studs or if the mirror exceeds 10kg, first reinforce with 18mm plywood screwed across multiple studs. Allow a 25mm gap between plywood and wall for the mirror bracket. Then fix anchors into the plywood itself to safely hold the weight long-term.
Fixing a Vanity Mirror to UK Brick or Block Walls
Mark drill holes at evenly spaced points on solid walls. Using a masonry bit, shallow-drill clearance holes 6mm wider than the wall plug diameter. Brush dust away.
Gently tap nylon or metal wall plugs into each hole until flush with the wall. For damp bathroom zones, consider treated steel plugs rated to IP44.
Mount the mirror bracket securely using heavy-duty general purpose screws matched to the wall plug fitting. Apply silicone sealant around each screw head where it meets the wall to prevent moisture ingress behind bathroom tiles over time.
Allow 24 hours curing before attaching your mirror. Check alignment with a spirit level, and have an assistant help lift while attaching the mirror if heavy.
Securing Your Wall-Mounted Bathroom Mirror
With wall fixings and electrics now complete, unpack and align your illuminated mirror unit. engage any hanging brackets or clips with their wall mounting plate counterpart. Compress fitting springs or tighten any adjustment screws until snugly fit.
Check sideways stability by firmly pushing parallel to the wall once mounted. The unit should not rattle, creak or ease out of place. Instead, compression from tight vertical alignment keeps the mirror solidly immobile when correctly installed.
Finally, ask an assistant to temporarily hold the unit while you step back and verify it hangs straight using a spirit level. Make any adjustment screw tweaks to fine-tune alignment.
Testing Your Vanity Mirror Lights and Fixing Issues
With safety checks complete, restore mains power and test illumination functionality using the light switch. Verify stable, flicker-free lighting across all integrated mirror lamps and LEDs before continuing.
Next, run any supporting fans, looking for airflow interference possibly dislodging the unit. Inspect closely for any vibration or wobble while operating. If supports screws feel unstable, tighten fully or reinforce mounting points with extra plastic anchors.
Check where the unit contacts wall surfaces once more for gaps that may allow bathroom moisture entry over long-term use. Re-apply silicone sealant if necessary to prevent condensation creeping behind.
Expert Tips for UK Vanity Mirror Installation
There are some UK-specific tips and best practices that you need to keep in mind when you proceed with vanity mirror installation. Read this section and we will share few such tips with you.
· Use Moisture Resistant Materials
Select IP44-rated illuminated mirrors designed to withstand bathroom humidity and water splashes from sinks or tubs. Then you can ensure the longevity of the mirrors that you buy.
· Opt for Mirrors with Isolation Transformers for LEDs
Integrated GFCI/RCD protection provides electrical shock safeguards. Opt for LED designs with isolation transformers—these prevent low voltage drops from other lights on the same circuit.
· Avoid Tiles Drilling
Take care when drilling into tiled walls—holes located in grout joints allow safer, less noticeable mounting. Consider adding a waterproof 15mm plywood backing board if drilling through ceramic tiles. This structurally distributes weight to prevent cracked or dislodged tiles long-term.
For heavy convex mirrors, use reinforced French cleat hanging mounts. This clip system makes aligning and lifting safer during solo installation.
Conclusion
Achieve a professional, safe install by following UK guidelines for bathrooms. From Part P electrical compliance to customising mounting methods for plasterboard versus solid brick construction, this guide covers common challenges and safety considerations. Proper preparation tailored to your wall type results in secure, long lasting illumination free of vibration, damp issues or wobble.
Bring high-end hotel elegance into your space with convenience built right into your mirror. When in doubt, consult a certified electrician to ensure full compliance with Part P regulations.
You can visit Elegant Showers UK Online Shop for best vanity mirror solutions with professional consultation. We make it easy for you to get the best vanity mirrors with lights and add more functionality to your bathroom.


Validate your login