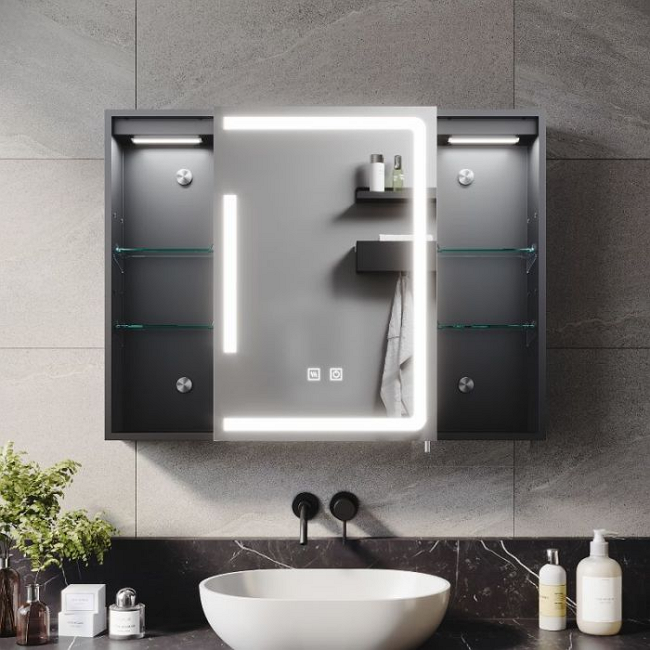
Upgrading your bathroom with a bathroom mirror cabinet is one of the smartest investments you can make. It combines a full-surface mirror with concealed storage, instantly decluttering your sink area while adding a polished, modern look. Yet many UK homeowners hesitate to tackle the installation themselves, worried about drilling into expensive tiles or damaging plasterboard walls. The good news? With the right guidance, proper tools, and a little patience, you can complete this project in a single weekend. This guide walks you through every step – from choosing the right bathroom cabinet with mirror to making those critical final adjustments – so you can enjoy a professional finish without hiring a handyman.
How to Choose the Right Bathroom Mirror Cabinet for Your UK Home
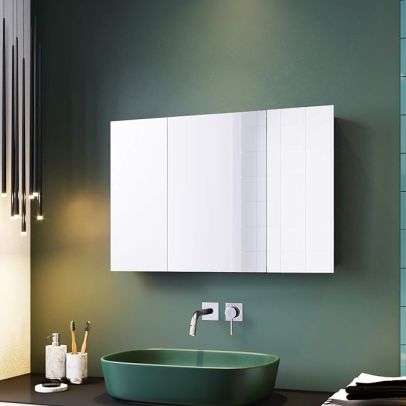
Before you pick up a drill, you need the right mirrored bathroom cabinet for your space. UK bathrooms vary enormously – from compact cloakrooms to spacious family ensuites – so consider three factors: wall space, storage needs, and the existing layout.
First, measure the available wall area above your basin. A standard bathroom cabinet with mirror should be slightly narrower than the basin below, typically 50–60 cm wide for a single sink. For depth, surface-mounted cabinets are usually 12–18 cm deep; recessed models sit flush within the wall, saving space but requiring cavity access.
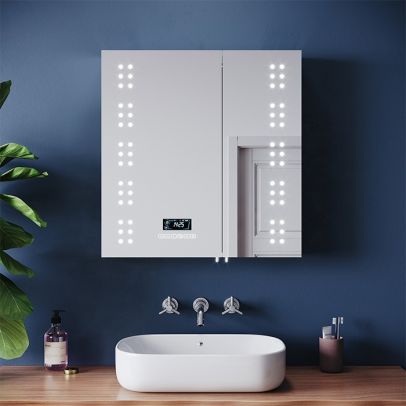
Second, think about what you will store inside. If you have many tall bottles (shampoo, lotions), look for adjustable shelves. For family bathrooms, a dual-door mirrored bathroom cabinet offers better organisation.
Third, follow UK standard height guidance. The centre of the mirror should sit at eye level, approximately 145–165 cm from the finished floor. Also maintain a 20–30 cm gap above the basin to prevent water splashes from reaching the cabinet base.
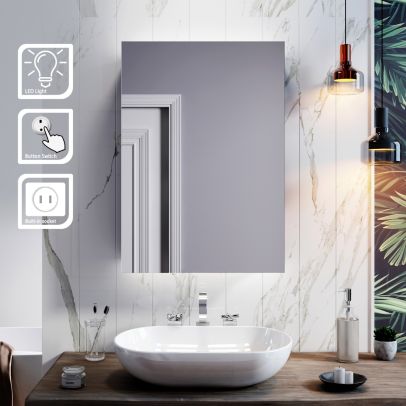
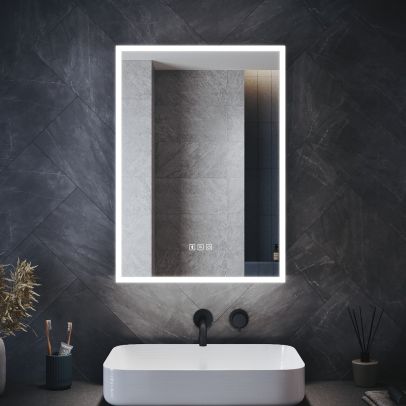
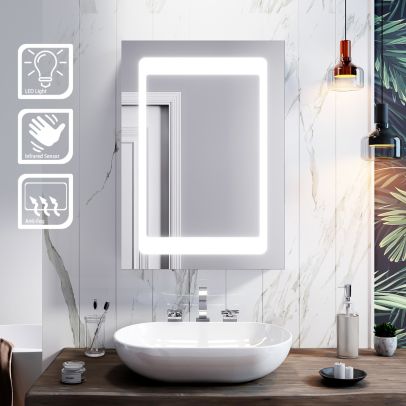
Finally, consider electrical needs: illuminated or demister-pad units often require hardwiring. If you are not comfortable with electrical work, choose a non-illuminated model or budget for a qualified electrician.
The Ultimate Checklist of Bathroom Mirror Cabinet Installation: Tools & Wall Fixings You’ll Need
Gathering everything beforehand makes the installation smoother. Here is your complete toolkit:
-
Measuring and marking: Spirit level (a 600 mm or 900 mm level is ideal), tape measure, pencil, masking tape.
-
Drilling: Electric drill (hammer function for brick/concrete), set of high-speed steel (HSS) bits, plus tile drill bits (tungsten carbide tipped) if you are drilling through ceramics.
-
Fixing and fastening: Screws (typically 4 mm or 5 mm diameter, 40–50 mm long), universal wall plugs (rawlplugs), and – critically – specialist fixings for plasterboard (spring toggles, cavity anchors or Grip-It fixings) because standard rawlplugs will fail in a stud wall.
-
Safety: Safety goggles, dust mask, and a voltage/cable detector (essential before drilling into any wall).
-
Final assembly: Screwdriver (electric or manual), rubber mallet (for tapping plugs), and a helper to lift the cabinet.
If you are tiling, add masking tape (to mark drill spots and stop the bit skating) and a spray bottle of water (to cool the tile bit).
Essential Tools and Materials for a UK Bathroom Mirror Cabinet Install
Having the correct tools on hand before you start saves frustration. Here is a complete checklist tailored to typical UK construction – brick, plasterboard, and tiled walls.
| Tools | Materials |
|---|---|
| Power drill with hammer function (for masonry) | Wall plugs – red (plasterboard), brown (brick/clay block) |
| Spirit level (600 mm or longer) | Bathroom mirror cabinet with included fixings |
| Measuring tape | Screws (check length – must penetrate at least 40 mm into masonry) |
| Pencil (soft lead) | Silicone sealant (bathroom-grade, anti-fungal) |
| Stud finder & pipe/wire detector | Heavy-duty wall anchors (toggle bolts for plasterboard) |
| Tile drill bit (diamond or carbide spear-point) | Mounting bracket (usually supplied) |
| Masonry drill bit (sized to match wall plugs) | Safety goggles and dust mask |
| Screwdriver (Pozi or Phillips, as required) | Masking tape |
Pro tip: Do not assume the screws supplied with your cabinet are long enough. For brick walls, you need screws that penetrate at least 40 mm into the masonry beyond the plaster depth.
Step-by-Step Guide: How to Install Bahtroom Mirror Cabinets
Installing a bathroom mirror cabinet requires patience, precision, and the correct sequence of actions. This extended guide walks you through every single stage, from unpacking your cabinet to the final silicone seal. Follow each substep in order, and do not skip the preparatory checks – they are what separate a professional install from a wonky, unsafe one.
Stage 1: Marking the Wall for Your Mirror Cabinet
Step 1: Find and Mark the Centre Point of Your Basin/Sink
Measure the width of your basin or vanity unit. Divide by two to find the centre. Use a spirit level to draw a vertical line upward from that point. This is your main reference line.
Step 2: Mark the Desired Height (Top and Bottom)
Decide on the cabinet’s final position using the earlier height guidance (mirror centre at 150‑160 cm). Draw a horizontal line at the cabinet’s planned top and bottom. Alternatively, mark where the mounting bracket or keyhole slots will align.
Step 3: Transfer Fixings from Cabinet to Wall
Lay the cabinet face-down on a towel to protect the mirror. Measure the exact distance between the mounting holes on the back. Transfer that measurement onto the wall, keeping the vertical centre line as your guide. Use masking tape to mark the drilling spots – this avoids pencil smudges on slippery tiles.
Step 4: Double-Check Alignment Before Drilling
Hold the cabinet (or a cardboard template cut to size) against the wall at the marked points. Sight along the spirit level. Ask a helper to stand back and confirm the placement looks centred and level. Correct any errors now – mistakes are much harder to fix after drilling.
Stage 2: Drilling Holes for a Mirrored Bathroom Cabinet
Drilling sounds simple, but the technique changes dramatically depending on your wall type. Follow this two-part guidance.
How to Install a Bathroom Mirror Cabinet on Tiles (Without Cracks)
This is the most nerve‑wracking step for many DIYers. Here is the safe, crack‑free method:
-
Use the correct tile drill bit – a tungsten carbide spear-point or diamond-tipped bit. Do not use a standard masonry bit; it will skid and fracture the glaze.
-
Start at low speed – 400–600 RPM with very light pressure. Let the bit gently abrade through the glossy surface. Apply a little water as a coolant (a spray bottle works perfectly).
-
Penetrate the glaze – once you feel the bit “bite” through the hard outer layer, you can increase speed and pressure slightly.
-
Switch to a masonry bit – after passing through the tile into the substrate (brick or concrete), change to a standard masonry bit of the same diameter to drill the full depth (usually 40–50 mm).
-
Avoid hammer action until you are fully through the tile – hammering while on the glaze will shatter it.
How to Install a Recessed Bathroom Mirror Cabinet
A recessed bathroom mirror cabinet lives inside the wall cavity. This is an advanced project. You will need to:
-
Cut an opening in the plasterboard using a drywall saw or multi‑tool.
-
Check that the cavity depth is sufficient (UK 2x4 studs allow about 90 mm of depth, which is enough for a slim recessed unit).
-
Install timber noggins (horizontal supports) between the studs to screw the recessed cabinet frame into.
-
Ensure no electrical cables or pipes run through that section of wall – a cable detector is non‑negotiable.
For most DIYers, surface-mounted installation is far simpler and safer.
Stage 3: Fitting Wall Plugs and Securing the Mounting Bracket
After drilling, blow out dust from each hole. Insert the wall plug (rawlplug) and tap it gently with a hammer until it sits flush with the wall surface. For tiled walls, the plug should be slightly recessed (1–2 mm below the tile face) to allow the screw to pull the bracket tight.
For plasterboard walls: Standard red rawlplugs will spin and fail. Use dedicated plasterboard fixings – spring toggles, butterfly anchors, or ‘GripIt’ style fixings. These spread the load behind the board.
For masonry walls (brick, concrete, thermal block): Brown rawlplugs are the standard choice for medium to heavy loads. Ensure the hole depth is at least 5 mm longer than the plug so debris does not block full insertion.
Securing the Mounting Bracket
Position the mounting bracket over the holes. Drive the screws through the bracket and into the seated wall plugs. Tighten firmly but do not over-tighten – especially in plasterboard or tiles, where over-tightening can strip the grip or crack the tile. A snug, secure feel is enough.
Use your spirit level on the bracket itself. Check both horizontally and vertically. If the bracket is not level, the cabinet will hang crookedly.
When to Use Heavy-Duty Wall Anchors
If your mirror cabinet weighs more than 15–20 kg (typical for large illuminated models with glass shelves), or if you cannot fix into studs, upgrade to toggle bolts for hollow walls or expanding sleeve anchors for masonry. Follow the anchor manufacturer’s instructions for drill bit size and hole depth.
Stage 4: Hanging and Adjusting the Bathroom Mirror Cabinet
Step 1 – Prepare the screws
Screw your chosen screws into the wall plugs or anchors, leaving about 5–10 mm of the screw head protruding (just enough to engage the cabinet’s keyhole brackets).
Step 2 – Lift and align
With a helper, lift the bathroom cabinet with mirror and hook the keyhole slots over the screw heads. Let the cabinet rest gently against the wall.
Step 3 – Re‑level
Place your spirit level on top of the cabinet. If it is not perfectly horizontal, do not force it – simply remove the cabinet, adjust the screw depth (screw in or out a quarter turn), and retry. This is the most important final adjustment step.
Step 4 – Tighten and check
Once level, tighten the screws fully (but gently – over‑torquing can crack tiles or crush plasterboard). Add any additional bottom fixing screws if your cabinet has them. Finally, open and close the mirrored doors several times. They should move smoothly without rubbing against the frame. If they bind, loosen the hinge screws slightly and re‑align the doors.
FAQs – People Also Ask About Bathroom Mirror Cabinet Installation
What is a bathroom mirror cabinet called in the UK?
It is most commonly called a mirrored bathroom cabinet or a bathroom cabinet with mirror. The term “medicine cabinet” is understood but less common in UK retail.
What height should a bathroom mirror cabinet be installed?
Centre the mirror at average eye level – roughly 150–160 cm from the finished floor for most UK bathrooms. Leave 10–20 cm clearance between the basin tap and the bottom of the cabinet.
Do I need an electrician to install an LED bathroom mirror?
If the unit is hardwired into your mains, yes. UK Part P building regulations require that notifiable electrical work in bathrooms be carried out by a qualified electrician. If the cabinet comes with a moulded plug, you can plug it into a shaver socket.
Can I install a bathroom mirror cabinet without drilling into tiles?
For very lightweight mirrors, high-strength adhesive mounting tape can be used. However, for standard cabinets, drilling is highly recommended for safety and weight support.
How to install a recessed bathroom mirror cabinet if there are pipes in the wall?
Stop immediately. Do not cut into a wall containing plumbing or electrical cables. You must either reroute the utilities (a professional job) or switch to a surface‑mounted cabinet.
Conclusion
Installing a bathroom mirror cabinet is a satisfying DIY project that immediately improves both storage and aesthetics. By following this step‑by‑step guide – planning your cabinet choice, marking the wall with precision, drilling correctly (especially through tiles), using the right wall fixings, and making careful final adjustments – you can achieve a professional finish. Whether you opt for a standard surface‑mounted unit or a recessed bathroom mirror cabinet, the principles remain the same: measure twice, drill once, and always prioritise safety. Now go ahead and enjoy your clutter‑free, beautifully lit bathroom. And if your installation goes well, share your success with fellow DIYers online.
Ready to find the perfect bathroom mirror cabinet for your home? Visit Elegant Showers today at https://www.elegantshowers.co.uk/ to explore a stunning collection of mirrored bathroom cabinets, including illuminated LED designs with demister pads, shaver sockets, soft‑close hinges, and smart features. Whether you need a compact unit for a cloakroom or a spacious triple‑door cabinet for a family bathroom, Elegant Showers offers solutions to suit every style and space—with free delivery across mainland UK. Head over to their website for expert advice, product inspiration, and the latest deals, and turn your bathroom into the organised, stylish sanctuary you’ve always wanted.

Validate your login