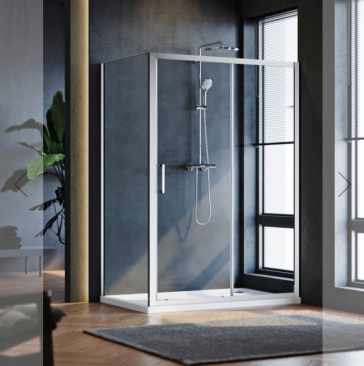
There's something deeply satisfying about stepping into a shower enclosure you've installed yourself. Not only does it look professionally done, but you've also saved a considerable amount on plumber fees. Installing a shower enclosure might seem daunting at first, but it's entirely achievable with the right guidance and a bit of patience.
The UK market offers a wide variety of shower solutions. You'll find everything from compact quadrant shower cubicles perfect for smaller bathrooms to spacious walk-in glass shower enclosures that create a luxurious spa-like feel. There are also all-in-one shower cabin units that come with everything built in, making installation somewhat simpler.
This guide will walk you through the entire process of fitting a shower enclosure. We'll cover everything from choosing the right shower cubicle and tray combination to installing standalone shower cabin units. You'll learn each step needed to achieve a leak-free, professionally finished result. The key to success lies in thorough preparation and taking your time to ensure precision at every stage.

Planning and Choosing Your Shower Cubicles and Enclosures
Before you pick up a single tool, successful fitting a shower enclosure begins with meticulous planning. Rushing this stage is the most common cause of problems later on. The first decision you need to make is what type of enclosure suits your bathroom layout and personal style.
Types of Shower Enclosures: Cubicles, Cabins, and Trays
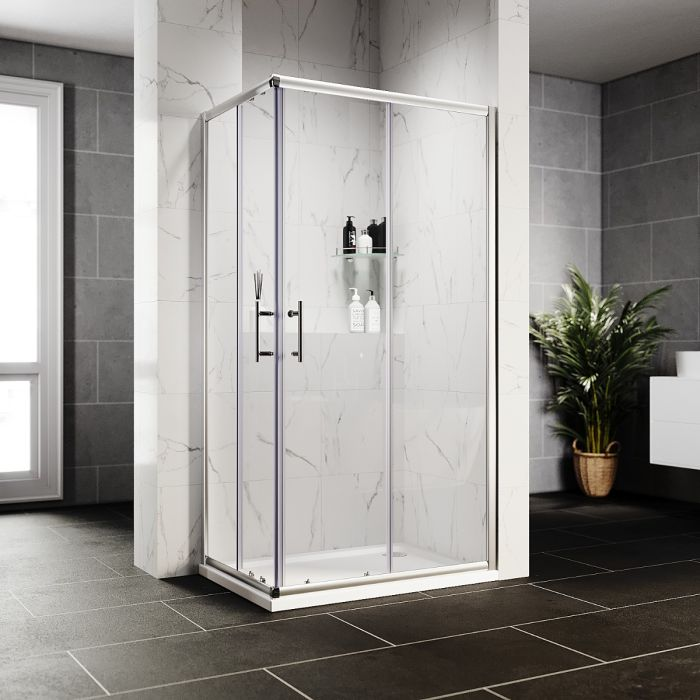
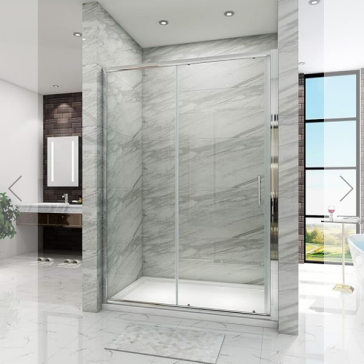
Before you start, you need to understand what's available. Quadrant shower enclosures fit neatly into corners with a curved door, making them ideal for compact bathrooms. Offset quadrant models offer a bit more space with an elongated design. Rectangular enclosures provide maximum shower space and work well in larger bathrooms.
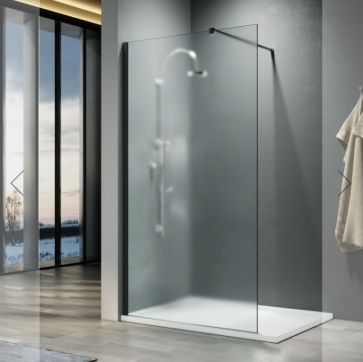
Walk-in glass shower enclosures have become increasingly popular in UK homes. They feature a fixed glass panel without a door, creating an open, modern look. All-in-one shower cabin units come as complete packages with walls, doors, and often built-in shelving and shower heads. These units simplify installation but offer less flexibility in design.
Measuring Up: The Critical First Step for Your Shower Space
Accurate measurements are absolutely essential when fitting a shower cubicle. Start by measuring the width and depth of your shower area at multiple points. Walls in older UK homes are rarely perfectly straight, so measure at the top, middle, and bottom. Note any variations you find.
Check if your walls are truly square by measuring diagonally across the corners. Both diagonal measurements should match if the space is square. Use a spirit level to verify that your floor is level. Any slope will affect water drainage and how your shower tray sits. Even small discrepancies can cause major problems during installation, so take your time with this step.
Essential Tools and Materials for Installing a Shower
Gather everything you need before starting. You'll require a spirit level, tape measure, silicone gun, electric drill with masonry bits, screwdrivers (both flathead and Phillips), pencil, and safety glasses. Add a utility knife, adjustable spanner, and masonry wall plugs to your toolkit.
Don't forget materials like high-quality sanitary silicone, PTFE tape for plumbing connections, and dust sheets to protect your bathroom. Having everything ready means you won't need to stop mid-installation to run to the hardware store.
Preparing the Area and Plumbing for Your New Shower
A successfulshower installation is built on a foundation of meticulous preparation. Rushing this stage to get to the "exciting" part of building the enclosure is the most common mistake DIYers make, often leading to leaks, instability, and costly repairs down the line. Proper preparation for fitting a shower involves two parallel streams of work: making the space physically ready and ensuring the plumbing is correctly configured and safe to work with.
Isolating the Water Supply and Making it Safe
Safety comes first when installing a shower. Turn off the water supply at the main stopcock before you begin any work. Open taps to drain remaining water from the pipes. If you're working near electrical outlets or switches, turn off the power at the fuse box as well.
This step is crucial and non-negotiable. Working with live water supply or electricity creates serious safety risks. Take the time to do this properly before proceeding with any installation work.
Wall and Floor Surface Preparation
Your shower enclosure needs stable, clean surfaces to attach to properly. Remove any old sealant, soap residue, or mold from the walls using a scraper and suitable cleaner. Check that wall tiles are firmly attached. Any loose tiles need regrouting or replacing before you continue.
Examine the floor where your shower tray will sit. It should be flat, level, and strong enough to support the weight. Clean away dust, debris, and any old adhesive. If you're fitting a shower tray on a wooden floor, ensure the joists underneath can handle the load of the tray plus water and a person. You might need to add extra support.
How to Install a Shower Tray Correctly
The shower tray is the very foundation of your entire enclosure. A poorly installed tray is the primary cause of shower failures, leading to persistent leaks, water damage to subfloors and ceilings below, and an unstable structure that can cause doors to stick and seals to fail. Fitting a shower tray is not just about placing it on the floor; it's a precise exercise in levelling, supporting, and sealing. Getting this step perfect is non-negotiable for a professional and long-lasting result.
Positioning and Levelling the Shower Tray
A perfectly level shower tray is absolutely essential for proper water drainage. Even a slight tilt in the wrong direction will cause water to pool rather than flow toward the waste. Place your tray in position and check it with a spirit level in multiple directions.
Most shower trays have built-in drainage slopes, but the tray itself must sit level. Use adjustable legs if your tray has them or create a mortar bed for support. Check the level repeatedly as you work. This is the foundation of your entire installation, so don't rush this step.
Securing the Tray and Connecting the Waste
Once your tray is perfectly level, it's time to secure it. Some trays screw directly to the wall, while others require adhesive or a mortar bed for stability. Follow your manufacturer's instructions for your specific model.
Connecting the waste pipe correctly prevents future leaks and headaches. Apply PTFE tape to threaded connections before tightening. Ensure the trap connects securely to both the tray outlet and the waste pipe. Hand-tighten first, then give it an extra quarter turn with a spanner. Don't overtighten, as this can crack plastic components.
Test the waste connection by pouring a bucket of water into the tray. Watch carefully underneath for any drips or leaks. It's much easier to fix problems now than after you've installed the entire enclosure.
Fitting the Shower Cubicle Frame: A Step-by-Step Guide
The moment has arrived to build the skeleton of your enclosure. Fitting the shower cubicle frame is a pivotal stage where precision truly pays off. A frame that is perfectly square, level, and plumb ensures the glass doors will hang correctly, seal properly, and operate smoothly for years to come. Rushing this process will lead to misaligned doors, persistent leaks, and immense frustration. Think of the frame as the architectural blueprint for your glass shower enclosures; if the blueprint is off, everything built upon it will be too.
Assembling the Side Profiles and U-Channel
Most shower cubicles UK models come with detailed assembly instructions specific to that design. Read through these completely before starting. Lay out all the frame components and identify each piece.
Start by assembling the side profiles and U-channel sections. These form the skeleton of your enclosure. Don't fully tighten screws yet, as you'll need adjustment room when fitting the frame to potentially uneven walls. Just make connections finger-tight for now.
Fixing the Frame to the Walls and Tray
Hold the frame in position against the walls and mark where you'll need to drill. Use a pencil to mark through the mounting holes. Set the frame aside and drill pilot holes at your marks. For masonry walls, use appropriate wall plugs that fit snugly.
Position the frame back in place and insert screws through the mounting holes into your wall plugs. Start screwing but don't fully tighten yet. Use your spirit level to check that the frame is plumb (perfectly vertical). Adjust as needed before tightening all screws firmly.
Tips for Dealing with Out-of-Plumb Walls
UK homes, particularly older properties, often have walls that aren't perfectly straight or plumb. This is a common challenge when fitting a shower enclosure. Don't panic if you encounter this issue.
Most quality shower frames include adjustment screws or shims that compensate for uneven walls. Small gaps between the frame and wall can be filled with silicone sealant. For larger gaps, you might need to use plastic shims behind the frame to create a plumb surface. The goal is to ensure the frame itself is straight, even if the walls aren't.
Installing the Glass Panels and Doors on Your Enclosure
This is the most visually transformative part of the project. The moment the glass is installed, your shower enclosure truly comes to life. However, handling large, heavy panels of tempered glass is a task that demands the utmost respect for safety and precision. A single mistake here can be costly and dangerous. Success in this phase is not just about strength; it's about technique, patience, and meticulous adjustment to achieve that satisfying, seamless operation of a professionally fitted shower enclosure.
Handling Glass Safely and Positioning Panels
Glass shower enclosures are heavy and potentially dangerous if mishandled. Always wear work gloves when handling glass panels. Have someone help you, especially with larger panels. Never try to install glass alone.
Most panels slot into the frame channels you've already installed. Carefully lift each panel and slide it into position. Some designs require you to install panels in a specific order, so check your instructions. Take your time and move slowly to avoid accidents.
Adjusting Doors for a Perfect Swing and Seal
Once your panels are in place, hang the door using the hinges provided. Most shower enclosure doors have adjustment screws on the hinges. These let you fine-tune how the door sits and swings.
Open and close the door several times. It should swing smoothly without catching on the tray or frame. The magnetic strips or seals should meet evenly when closed. Use the adjustment screws to raise, lower, or angle the door until everything aligns perfectly. This adjustment ensures water stays inside where it belongs.
Sealing Your Shower Enclosure to Prevent Leaks
This is the final, critical line of defence in fitting a shower enclosure. While a well-levelled tray and a plumb frame are essential, it is the humble bead of silicone sealant that ultimately stands between a dry bathroom floor and devastating water damage. A poor sealing job can undermine all your previous hard work, leading to persistent leaks, rot, and mould growth. This stage cannot be rushed; it demands the right materials, a meticulous technique, and a commitment to perfection. Mastering this skill is what truly separates an amateur installation from a professional, long-lasting finish for your shower cubicle.
Choosing the Right Sanitary Silicone
Never skimp on silicone quality. This is not the place to save money. Choose a high-quality sanitary silicone specifically designed for bathrooms. Look for products labeled as mold-resistant and waterproof. Clear silicone looks cleaner on glass, while white works well against white trays and tiles.
Cheap silicone will fail quickly in the wet environment of a shower. It might crack, peel, or develop mold within months. Quality silicone lasts for years and maintains a watertight seal.
Technique for a Perfect, Professional Silicone Bead
Applying silicone neatly takes practice, but there's a simple technique that works well. First, ensure all surfaces are completely dry and free from dust. Cut the silicone nozzle at a 45-degree angle, creating an opening about 3-4mm wide.
Apply steady pressure while moving the gun smoothly along the joint. Try to maintain consistent speed and pressure for an even bead. Once applied, wet your finger with soapy water and run it along the silicone bead in one smooth motion. This creates a professional, concave finish and pushes the silicone into the joint. Wipe excess silicone off your finger regularly with kitchen paper.
Focus on sealing where the tray meets the walls, where the frame meets the tray, and any gaps between the frame and walls. These are the areas most vulnerable to water escape.
Final Checks Before Using Your New Shower
The tools are packed away, and your new glass shower enclosure gleams, promising a luxurious experience. However, the final and most critical phase of installing a shower is about to begin: the systematic commissioning and testing. Rushing to use the shower now could undo all your hard work. This disciplined, step-by-step verification process is what ensures your enclosure is not just beautiful but also functionally perfect, watertight, and built to last. Think of it as the pre-flight checklist for your new shower.
Reconnecting Water and Testing for Leaks
With everything installed and sealed, it's time to test your work. Reconnect the water supply by turning on the main stopcock. Turn on the shower and let water run for several minutes. Watch carefully for any leaks around the waste connection, along the tray edges, and where the frame meets the walls.
Check underneath the tray if possible. Even tiny drips need addressing now. If you spot any leaks, turn off the water, dry the area completely, and apply additional silicone to the problem spot.
Curing Time for Silicone and Care Instructions
Resist the temptation to use your new shower immediately. Silicone needs time to cure fully and achieve maximum waterproofing. Most products require 24 hours before the shower can be used. Check your specific silicone's instructions, as curing times vary.
During this waiting period, avoid touching the silicone or getting it wet. Once cured, your shower enclosure will provide years of reliable service. Clean glass panels regularly with a squeegee to prevent water marks and limescale buildup.
Enjoy Your Professionally Fitted Shower Enclosure
You've done it. By following each step carefully and taking your time with measurements, leveling, and sealing, you've successfully installed a shower enclosure that looks professionally done. The satisfaction of completing this project yourself is matched only by the money you've saved on installation costs.
The secret to success lies in meticulous planning, accurate measurements, and patience during each stage of installing a shower. When you rush or skip steps, problems emerge later. Take your time, double-check your work, and don't hesitate to make adjustments until everything is perfect.
Fitting a shower enclosure is a highly achievable project that significantly enhances your bathroom's functionality and value. You've transformed your bathroom space while gaining valuable DIY skills. Every time you step into your shower, you'll feel proud knowing you built it yourself.
Visit Elegant Showers UK Online Shop to explore more shower enclosure solutions with professional consultants ready to help you choose the perfect setup for your bathroom.


Validate your login