

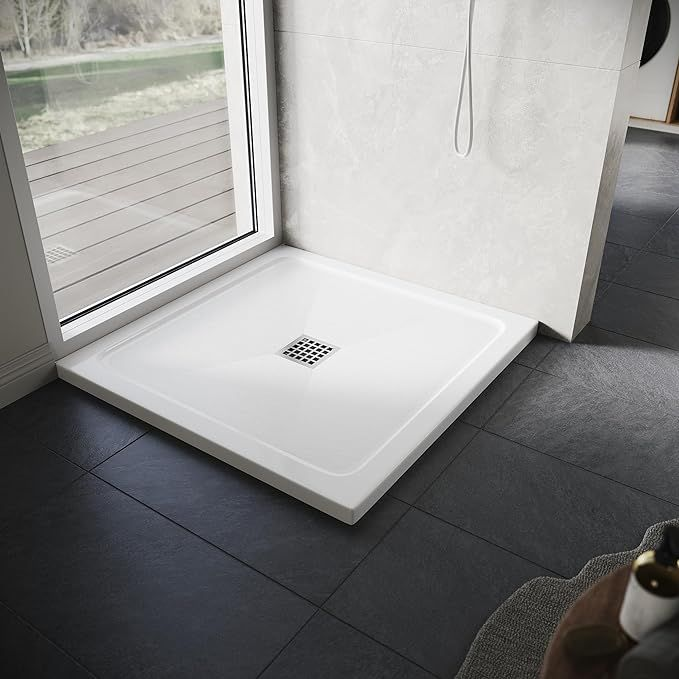
The shower tray is the unsung hero of any bathroom renovation. It is the foundation upon which your entire shower enclosure sits, and getting its installation wrong can lead to catastrophic consequences: leaking ceilings, rotting floor joists, costly bathroom repairs, and unsightly mould growth. Whether you are converting an alcove into a walk-in shower or fitting a quadrant tray in a small ensuite, understanding how to fit a shower tray correctly is essential for any UK DIY enthusiast.
In this comprehensive guide, we will walk you through every step of the shower tray installation process, from selecting the right materials for your subfloor to applying the final bead of mould-resistant silicone. Drawing on expert advice from professional bathroom fitters and the latest UK building regulations, this 2000-word article will give you the confidence to tackle this project yourself—saving hundreds of pounds in labour costs while ensuring a watertight, durable result that will last for decades.
Planning and Selection – Choosing the Right Tray for Your UK Bathroom
Before you even think about mixing adhesive, cutting waste pipes, or opening that shiny new toolbox, proper planning is absolutely essential. The shower tray you choose must fit your space perfectly, suit your specific subfloor construction, complement your bathroom layout, and meet your practical needs for years to come. Rushing this stage is the single most common mistake made by DIY enthusiasts, leading to ill-fitting trays, compromised waterproofing, and expensive remedial work. Let us walk through every consideration to ensure you get it right first time.
Measuring Your Space for a Shower Tray
The golden rule of bathroom fitting applies here: measure twice, cut once—or in this case, measure twice, order once. Standard UK shower tray sizes typically range from 900mm x 900mm for compact corner installations in ensuites, through to 1700mm x 700mm for alcove replacements in family bathrooms. However, these are not the only options available. Manufacturers offer a vast array of sizes, including 1000mm x 800mm, 1200mm x 800mm, and 1400mm x 700mm, allowing you to maximise every inch of available floor space.
When measuring your alcove or corner space, you must account for the thickness of wall tiles and backer boards. A common and costly mistake is ordering a tray that fits the bare plasterboard perfectly, only to discover it is too large once 10mm of tile adhesive and 8mm of ceramic tile are applied to both walls. Always measure from the structural wall surface, then subtract the combined thickness of your planned wall finishes. If you are unsure, allow a 20-25mm gap on each side, which can be neatly filled with silicone or covered by tile overhangs.
Consider also the position of your shower valve and controls. These must be accessible and should not be obscured by the tray rim or shower enclosure. Mark their positions on the wall relative to your tray height to ensure comfortable operation once installed.
Shower Tray Materials: Acrylic vs. Stone Resin
The material you select significantly impacts not only the installation process but also the longevity, feel, and cost of your finished shower. Understanding the characteristics of each option is vital.
Acrylic trays remain the most popular choice for budget-conscious renovations in the UK. They are lightweight—typically weighing 5-10kg—making them easy for a single person to manoeuvre into position. They are warm underfoot, relatively impact-resistant, and available in a vast range of shapes and sizes. However, acrylic has a significant drawback: flexibility. Under load, an acrylic tray will flex slightly, which means the supporting subfloor must be absolutely rigid and perfectly prepared. Any movement or void beneath the tray will eventually lead to cracking, creaking, and seal failure. Acrylic trays are best suited to solid concrete floors or exceptionally well-prepared timber decks.
Stone resin trays (also marketed as stone composite, mineral marble, or resin stone) have become the gold standard for premium bathroom installations. Composed of crushed natural stone mixed with resin binders, these trays are heavy—often 30-50kg—and offer a solid, reassuring feel underfoot that closely resembles natural stone. They are dense, non-porous, and excellent at retaining heat. Crucially, stone resin does not flex, so it will not crack under normal use provided the subfloor is level. However, this rigidity is also a potential weakness: if the subfloor is not perfectly flat, the tray will rock or sit under stress, leading to fractures. Stone resin trays require a perfectly level base and are best bedded on flexible adhesives that accommodate minor thermal expansion.
A third option, enamelled steel, is occasionally found in commercial settings or older homes. These trays are durable and resistant to scratching but are cold underfoot, noisy, and challenging to cut or modify.
Types of Trays for UK Bathrooms
Consider carefully the shape that best suits your bathroom layout and accessibility requirements.
Square and rectangular trays offer the greatest versatility. They fit neatly into alcoves, against walls, or can be positioned freestanding with screens on multiple sides. Rectangular trays are ideal for creating walk-in showers in larger bathrooms, providing generous floor space without the encumbrance of a door.
Quadrant and offset quadrant trays are specifically designed for corner installations. Their curved front maximises floor space in the centre of the room while fitting snugly into a corner. Offset quadrant trays feature an asymmetrical curve that positions the entry point further from the corner, creating more internal space and easier access—a popular choice for ensuites and small family bathrooms.
Low-profile and slimline trays have gained tremendous popularity with the rise of wet room styling and walk-in showers. These trays sit just 20-40mm above the finished floor level, creating a seamless, barrier-free entry that is both aesthetically pleasing and accessible for wheelchair users or those with limited mobility. However, low-profile trays present a significant installation challenge: the waste trap and pipework must fit within this shallow depth. This often requires recessing the tray into the subfloor, using ultra-shallow traps, or creating a raised platform elsewhere in the room to accommodate the waste fall. Professional advice is strongly recommended for slimline tray installations.
Tools and Materials – What You'll Need for a Professional Finish
Having the correct tools and materials ready before you start will make the installation smoother and prevent mid-project trips to the builders' merchant.
Essential Tools
-
Spirit level (at least 600mm long for accurate checking)
-
Jigsaw with fine-tooth blade (for cutting decking or tray adjustments)
-
Variable speed drill with mixing paddle
-
Notched trowel (8-10mm notch for adhesive)
-
Bucket for mixing
-
Sponge and clean water for cleaning squeeze-out
-
Tape measure and pencil
-
Utility knife
Materials for a Secure Fit
The bedding material is arguably the most critical decision. Flexible tile adhesive is widely recommended by UK professionals for its strength and slight flexibility, accommodating thermal expansion and minor floor movement. CT1 hybrid polymer adhesive has become increasingly popular for its incredible bonding strength and waterproof properties. Avoid traditional sand and cement mixes, as these can crack and turn to dust over time under the dynamic loads of a shower tray. You will also need a tanking kit, waterproof primer, and mould-resistant silicone sealant.
Preparing the Subfloor – The Foundation of Success
The longevity of your shower tray installation depends entirely on the quality of the subfloor preparation. A flexible or uneven base will inevitably lead to cracked trays and failed seals.
Assessing the Subfloor: Concrete vs. Wood Decking
In UK homes, subfloors typically fall into two categories: solid concrete or suspended timber. Concrete floors provide an excellent, stable base but may require levelling compound if uneven. Timber floors are more challenging. If you are fitting onto floorboards, these must be overlaid with at least 18mm WBP (weather and boil proof) plywood or 22mm caberboard. This creates a rigid, movement-free deck that will support the tray without flexing. Screw the plywood down every 150mm to eliminate any potential squeaking or movement.
Levelling the Floor
Place a long spirit level across the prepared subfloor in multiple directions. Any deviation from level must be addressed. For stone resin trays, the floor must be perfectly flat—these heavy trays will not bend to accommodate dips. Use self-levelling compound on concrete floors or pack out low spots on timber floors with additional layers of roofing felt or hardboard.
Tanking and Waterproofing
UK building regulations and good practice require effective waterproofing in wet areas. Tanking involves applying a waterproof membrane to the floor and walls before tray installation. Apply the tanking kit according to manufacturer instructions, extending it at least 150mm up the walls and ensuring complete coverage of the area where the tray will sit. Do as much tanking as possible before fitting the tray, as this creates a continuous waterproof layer that is easier to seal later.
Positioning the Waste Pipe
The shower waste pipe and trap must be correctly positioned to align with the tray's outlet. In timber floors, the trap should be supported on its own noggin—a block of wood fixed between joists—to prevent movement that could stress the waste connection. Dry-fit the trap to ensure it reaches the correct height and aligns perfectly with the tray outlet.
Common Installation Mistakes to Avoid
Even experienced DIY enthusiasts and occasional professional fitters can fall into these common traps when installing a shower tray. Awareness of these pitfalls is the first step to avoiding them, saving you from costly repairs, frustrating do-overs, and the potential for long-term water damage that can compromise the structural integrity of your bathroom. Let us examine the most frequent mistakes in detail, along with practical advice on how to avoid them.
Inadequate Subfloor Support
The most critical mistake—and unfortunately the most common—is failing to provide adequate support for the entire tray base. Many DIYers assume that a few dabs of adhesive or blobs of silicone around the edges will suffice to hold the tray in place. This could not be further from the truth.
When a tray is bedded on foam, loose mortar, or only at the corners, it creates voids beneath the surface. Every time someone steps into the shower, the unsupported areas of the tray flex under body weight. For acrylic trays, this repeated flexing leads to stress whitening, then hairline cracks, and eventually complete fracture. For stone resin trays, which do not flex, the lack of support creates a rocking motion that transfers stress to the waste connection and wall seals, inevitably causing leaks.
How to avoid it: The entire base of the tray must be supported by a continuous bed of flexible adhesive. Spread your chosen bedding material evenly across the prepared subfloor using a notched trowel, ensuring full coverage without gaps. For timber floors, verify that your plywood deck is screwed down every 150mm to eliminate any possibility of movement before you even begin.
Forgetting Expansion Gaps
Bathrooms experience significant temperature and humidity fluctuations. Hot water running onto a cold tray causes thermal expansion, while the surrounding materials—tiles, backer boards, and tanking—all respond differently to these changes. A frequent mistake is bonding the tray rigidly to the walls on all sides without any allowance for this natural movement.
When a tray expands against fixed walls, it has nowhere to go. The resulting stress can cause the tray to bow, crack at the corners, or push tiles off the wall. Conversely, if walls move slightly (as timber-framed walls often do), a rigidly fixed tray may fracture.
How to avoid it: The tray should not be mechanically fixed to the walls at all. The perimeter seal is provided by flexible silicone, which accommodates movement while remaining waterproof. Ensure there is a small gap—typically 2-3mm—between the tray edge and the wall surface, which will be filled entirely by the silicone seal. This gap provides the necessary expansion allowance.
Poor Waste Connection
The waste connection is statistically the most common source of leaks in shower installations. Several errors contribute to this: failing to support the trap independently, overtightening compression fittings, neglecting to use sealant on threads, or misaligning the pipework.
When the trap hangs unsupported, the weight of water and the flex of the tray during use puts constant stress on the joint. Over months and years, this stress gradually loosens the connection, leading to a slow drip that may go unnoticed until ceiling stains appear downstairs.
How to avoid it: Always support the trap on its own noggin—a block of wood fixed securely between joists or to the subfloor. This takes the weight off the tray outlet and prevents movement. When assembling the waste, apply a thin wipe of CT1 or silicone sealant to the thread of the trap under the rubber washer. Tighten firmly by hand, then a quarter turn with tools—no more. Overtightening can crack the tray boss or distort rubber seals, creating the very leak you are trying to prevent.
Ignoring Manufacturer Instructions
It is remarkably common for DIYers to discard the instruction manual and rely on YouTube videos or advice from forum threads. While these resources are valuable, every shower tray model has specific requirements: minimum support areas, waste fitting torque settings, and curing times for adhesives.
How to avoid it: Read the manufacturer's instructions thoroughly before starting. Keep them accessible throughout the installation. Different trays may require different approaches—what worked for your last bathroom may not be appropriate for this one.
Inadequate Curing Time
Modern adhesives and sealants are remarkable products, but they require time to reach full strength. Walking on a freshly bedded tray after just a few hours, or running water before silicone has cured, will compromise the installation permanently.
How to avoid it: Respect the curing times stated on product labels. Flexible tile adhesives typically require 24 hours before any load is applied. Silicone sealants need similar time to skin over and cure through. Place physical barriers around the work area and communicate clearly with other household members that the shower is out of bounds.
Poor Silicone Work
A final, common mistake is rushing the silicone sealing. Applying too little sealant, failing to tool it properly, or using old, partially cured silicone results in joints that trap dirt, harbour mould, and eventually fail.
How to avoid it: Use high-quality, mould-resistant silicone specifically formulated for bathroom use. Cut the nozzle at a 45-degree angle and apply a continuous, consistent bead. Tool the bead immediately using a silicone tool or a wet finger dipped in soapy water to create a concave finish that sheds water effectively. Ensure the silicone adheres to both surfaces without any gaps or voids.
Conclusion
Fitting a shower tray is one of the most critical tasks in any bathroom renovation. When done correctly—by avoiding common mistakes like inadequate support or poor waste connections—it provides a solid, waterproof foundation that will serve your family for decades. The key principles are simple: prepare the subfloor meticulously, use flexible adhesives rather than rigid mortars, and allow adequate curing time.
By following this comprehensive UK guide, you have the knowledge to tackle this project with confidence. Remember that patience and attention to detail are more important than speed. Once your tray is perfectly installed, the next exciting step is selecting the perfect enclosure, screen, or wetroom panel to complete your dream shower.
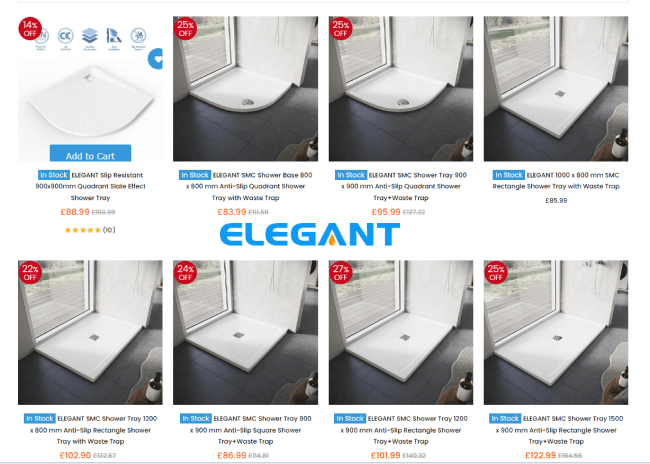
For that next step, and to explore a wide range of high-quality trays to suit every style and budget, we recommend visiting Elegant Showers. As one of the UK’s leading online bathroom retailers, they offer an extensive collection of shower trays in various materials, shapes, and sizes—from space-saving quadrant models to luxurious low-profile designs. You can browse their curated selection to find the perfect foundation for your project, all with free delivery to the UK mainland and competitive pricing.






Validate your login