

A properly sealed shower tray is important for preventing leaks and water damage in bathrooms. Leaky shower trays can lead to a number of problems, including structural damage from moisture, growth of mold and mildew, and unnecessary energy bills from heating water that escapes through cracks.
Maintaining an effective shower tray seal not only prevents leaks but also improves the overall look and feel of the bathroom. This article will provide DIY homeowners and professionals with a comprehensive guide on shower tray seals - from the importance of proper sealing methods to the different types of seals available and how to install them correctly. You’ll learn key considerations for selecting shower trays and compatible seals. As well as best practices for checking existing seals and performing repairs or replacements. With the helpful information in this article, you’ll be equipped with everything you need to know to ensure shower trays are properly sealed against leaks for improved protection, aesthetics, and peace of mind.

What is a Shower Tray Seal?
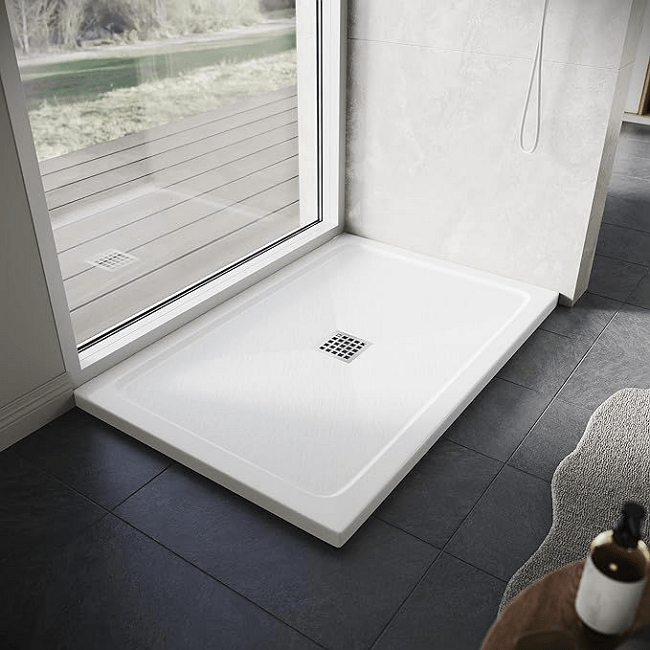
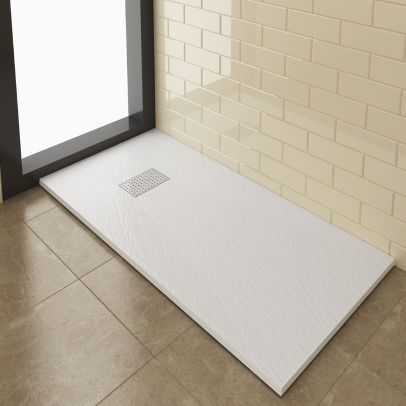
A shower tray seal is a waterproof barrier applied between the edges of the shower tray and the surrounding bathroom walls and floor. Shower tray seals prevent water from leaking underneath and around the tray, typically using materials like silicone sealants or specialized waterproof adhesive tapes. The main purpose is to contain water inside the shower area and direct it properly down the drain.
Why is Shower Tray Sealing Important?
Properly sealing the shower tray is extremely important for preventing leaks that can lead to water penetration and damage behind walls or under flooring. Consistent moisture in those areas can cause issues like mold growth, rotting subfloors, and the need for costly repairs. Effective sealing maximizes the longevity of the shower and installation..
Signs Your Shower Tray Needs Resealing
Some clear indicators that it’s time to reseal the shower trayinclude cracked or peeling sealant around the perimeter, visible water leakage around the edges of the tray, and any mold or mildew buildup along sealing surfaces which indicate moisture problems. Catching minor seal damage early makes quick fixes easier.
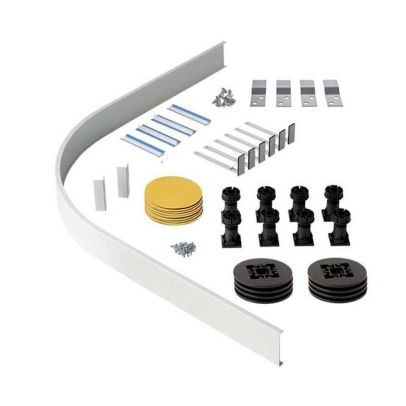
Tools and Materials Needed for Shower Sealing
Resealing a shower tray requires having the right supplies in hand. Essential tools that you need to have for shower sealing include:
· A high-quality caulking gun
· A sharp utility knife
· A plastic scraper
· Masking tape
· Cleaning solutions like isopropyl alcohol.
For the sealant itself, 100% silicone caulks designed for wet areas provide maximum durability and mold resistance once cured. Premium silicone sealants also allow for an enhanced finished look if aesthetics are a priority.
Optional but useful tools are silicone shaping and finishing tools, which help create perfect smooth beads every time. Foam backer rods can also assist with sealing irregular gaps and profiles around shower trays. Ensuring you have these key tools and using the proper bathroom-grade sealants will set you up for success with long-lasting shower seals that prevent leaks and stand up to humidity. Investing in high-performance sealants and taking the time to thoroughly clean surfaces prior to sealing are two of the most important best practices.

Step-by-Step Guide to Sealing a Shower Tray
Once you have all the supplies, you can go ahead with sealing shower tray. Here are the steps you should follow for it.
Step 1: Preparing the Area
The first step when resealing a shower tray is proper preparation of the area. Start by using a basic plastic scraper or sharp utility knife to carefully remove all old existing sealant from around the perimeter of the shower tray. Removing all the way down to the bare surface is important for maximum adhesion. Dispose of the scraped off sealant appropriately.
Next, thoroughly clean the now-exposed sealing surfaces using isopropyl alcohol, acetone, or other degreasing agents. This crucial step removes built-up residues, soap scum, oils, and other contaminants that can interfere with developing a tight seal. Be sure to let all cleaning products fully dry before moving on.
Step 2: Applying Masking Tape
Masking tape is extremely helpful for resealing shower trays, providing clean, straight sealant lines and also protecting the surfaces around the tray from excess silicone. Apply masking tape along the edges where the vertical walls and horizontal shower tray meet, pressing it down firmly. Ensure no gaps are left where sealant could leak underneath. The masking tape edging serves as a barrier to keep the silicone only where it needs to be.
Step 3: Applying the New Sealant
This is the most important step on how to seal a shower tray. With surfaces prepped and masked off, it’s time to apply the fresh sealant. Cut the nozzle of the silicone caulk at a 45-degree angle to allow for precise application in the corner crevices. Maintain a steady pressure on the caulk gun and smoothly run a consistent bead of sealant all along the shower tray’s edges where it meets the walls and flooring.
Applying silicone vertically from top to bottom is an easy technique. The bead width should be just enough to make flush contact across sealing surfaces.
Step 4: Smoothing the Sealant
For a neat finish, gently tool the sealant to smooth it out and ensure optimal adhesion within the first 5-10 minutes after application. Use a popsicle stick, plastic spatula, or silicone shaping tool. Also wet your smoothing tool tip with mild soapy water to prevent dragging.
Carefully smooth the sealant along the edges and corners, pressing it into gaps while removing any excess. This creates nice, coved corners. Once satisfied with the smoothing, carefully pull up the masking tape from the walls and tray at a 90 degree angle. Be sure to remove the tape while the silicone is still wet and has not begun curing.
Step 5: Curing and Testing
Allow the fresh silicone caulk seal to fully cure, which generally takes at least 24 hours until no longer tacky. Avoid water contact as the sealant undergoes its curing process. After 24 hours, carefully test the new shower tray seal by directing water onto walls and edges around the tray. Use a detachable showerhead if possible while checking for leaks.
Verify that water flows consistently into the drain and has no cracks or openings at tray corners. Confirm no water is dripping from the tray underside or onto flooring below. If all remains watertight after extensive testing, then enjoy a successfully resealed shower! If any leaks are apparent, immediately repeat steps to seal shower tray for reapplication.
How to Reseal a Shower Tray
Now you know about shower tray sealing. Along with that, it is also worth to have some knowledge on how to reseal shower tray.
What is the Difference Between Sealing and Resealing?
Resealing a shower tray differs from initial installations in a few key ways. When sealing for the first time, the shower tray can be empty and unmounted to allow complete access for optimal seals. Resealing occurs when the existing seals have failed in an already-installed tray.
How to Identify When Resealing is Necessary
Identifying when resealing is necessary involves checking for visible signs of deterioration like cracks, gaps, peeling corners, or areas of missing sealant. Another giveaway is water leakage making its way under or around the tray, evidence of seal failure.
Special Tips to Reseal Shower Tray
Resealing requires extra care to thoroughly remove old failing sealant and properly prep for new long-lasting seals. Special tips apply for resealing over existing shower builds. For example, it’s imperative to ensure 100% of the old silicone is removed from corners and edges prior to new sealant application.
Any leftover residue will prevent proper adhesion. Carefully cutting away old caulk with a utility knife while protecting surrounding surfaces is key. Surface cleaning is also critical before applying fresh seals.
Since areas under and around the tray may have enduring moisture damage, it’s important to allow those regions to fully dry out prior to resealing. This prevents trapping water underneath that enables continuing leaks or deterioration.
Other tips include letting new silicone cure undisturbed for 48 hours, checking your work from all angles to confirm no gaps, and rigorously leak testing before using the shower. Following these best practices for shower tray resealing will help recreate full water protection and extend the service life.
Common Mistakes to Avoid When Sealing a Shower Tray
When you seal shower tray, there is a possibility for mistakes to happen. Let’s take a look at few such common mistakes and how to avoid them.
Applying Sealant on a Damp Surface
It’s critical that the shower tray and all sealing surfaces are completely clean and dry before apply sealant. Any lingering moisture will prevent the silicone from properly adhering, leading to leaks.
Using the Wrong Type of Sealant
For showers, 100% silicone caulks formulated for wet areas provide the right level of flexibility and water resistance once cured. Using household caulks without these properties will lead to cracks and failure over time.
Failing to Smooth the Sealant Correctly
If sealant beads aren’t properly tooled and smoothed while still wet, this causes uneven, sloppy corners and edges with gaps where water can intrude. Taking the time to correctly smooth provides better aesthetics and sealing.
Skipping the Curing or Testing Phase
Allowing inadequate cure times prevents the sealant from reaching full strength. And failing to thoroughly test for leaks right away means you may miss problem areas in need of correction before putting the shower into use.
Maintenance Tips for Shower Tray Seals
After shower tray sealing, you need to take good care of it to ensure longevity. Here are some maintenance tips to follow.
Regular Inspections
Get in the habit of visually inspecting the seals around your shower tray a couple times per year. Check for any signs of damage, deterioration, discoloration, or mold growth. Early detection of minor sealant cracks or gaps makes quick fixes easier before major leak issues arise.
Regular Cleaning
Use mild, non-abrasive cleaners to keep sealant joints and shower corners free of residue buildup, soap scum, dirt, and grime. This helps delay sealant deterioration and also prevents unattractive mildew or mold from developing alongside seals.
Early Repairs
If regular inspections reveal any areas where the shower tray sealant appears to be failing, immediately address small repairs. Resealing limited problem spots prevents more expansive seal failures which lead to leaks and water damage. Catching isolated seal cracks early and resealing just those problem areas takes little time and investment.
Final Words
Effective water sealing around shower trays plays a critical role in bathroom functionality and longevity. When done correctly, high-quality seals prevent leaks, resist mold growth, and enable long-lasting showers that perform reliably for years before resealing becomes necessary. By applying the proper sealant products and following best practice installation techniques, homeowners can achieve professional-quality shower sealing themselves.
Remember to make seal inspections and maintenance part of regular bathroom care. Catching small issues early makes shower tray resealing much simpler when the time does come. For those seeking top-of-the-line showers or in need of major bathroom renovations, visit Elegant Showers UK Online Shop. Then you can explore your options or connect with our professional design consultants today. We offer stunning showers to suit any project needs and budget for luxury homes.
FAQs About Shower Tray Sealing
How often should I reseal a shower tray?
You should reseal a shower tray every 1-2 years, depending on usage and exposure to water. High-traffic bathrooms may require more frequent maintenance. Regular inspections help identify issues like cracks or peeling early. If you notice signs of leakage or mold, reseal immediately to prevent further damage. Using high-quality sealant and maintaining the shower area properly can extend the lifespan of the sealant and reduce the need for frequent resealing.
What type of sealant is best for shower trays?
The best sealant for shower trays is a high-quality, mold-resistant silicone sealant designed specifically for bathrooms. Look for sealants labeled as waterproof and anti-fungal to ensure long-lasting protection against moisture and mold growth. Popular options include neutral-cure silicone, which is less likely to discolor surfaces. Avoid general-purpose sealants, as they may lack the durability needed for wet environments.
Can I seal a shower tray without removing old sealant?
While it’s possible to seal over old sealant, it’s not recommended. Old sealant may compromise adhesion and result in leaks. Removing the old sealant ensures a clean surface for the new application, providing a stronger and more durable seal. Use a utility knife or a sealant remover to clear away the old material completely before applying fresh sealant.
How long does shower tray sealant last?
Shower tray sealant typically lasts between 1-3 years, depending on the quality of the sealant and maintenance practices. High-quality silicone sealants in well-maintained showers may last longer. Regular cleaning and avoiding harsh chemicals can help preserve the seal. Inspect the seal periodically for signs of wear, such as cracks or discoloration, and reseal as needed.
What should I do if my shower tray leaks after sealing?
If your shower tray leaks after sealing, inspect the area for gaps or uneven application of sealant. Remove and reapply sealant to any problem areas, ensuring a smooth and consistent layer. Check for underlying issues, such as cracks in the tray or wall tiles. If leaks persist, consider consulting a professional plumber to identify and address the root cause of the problem.


Validate your login