
Walk‑in showers (also called doorless or open‑entry showers) have become a signature feature of modern UK bathrooms. They look spacious, feel luxurious, and improve accessibility. But one question dominates every homeowner’s mind before they commit: do walk‑in showers splash water everywhere?
The honest answer is: yes, they can – but only when they are poorly designed. A walk‑in shower without a door does not have to mean a permanently wet bathroom floor. With careful planning – focusing on glass screen length, shower head position, floor slope, tray selection, and a few practical accessories – you can keep water exactly where it belongs. This article explains six proven ways to prevent splashing, backed by UK building standards and real‑world installer advice.
Why Walk‑In Showers Splash: Common Design Failures
Before we fix the problem, we need to understand exactly why walk‑in showers splash in the first place. Unlike a traditional enclosed shower with a door or curtain, a walk‑in (doorless) shower relies entirely on layout, surfaces, and gravity to contain water. When any of those elements are compromised, water escapes – often with frustrating results. Based on feedback from UK installers and bathroom designers, there are six specific design failures that repeatedly cause splashing in walk‑in showers:
1. The shower head is aimed directly towards the open entrance. This is the number one mistake. A wall‑mounted head angled towards the walk‑through gap will fire a stream of water directly onto the bathroom floor. Even a slight misalignment of 15‑20 degrees can send a surprising amount of water out of the enclosure.
2. The glass screen is too short (in length or height). Many homeowners choose a 900mm or 1000mm fixed panel, believing it is sufficient. In reality, with a typical 800‑900mm deep tray, a 900mm screen leaves a 600‑700mm opening – far too large. Water splashes sideways and simply bypasses the glass. Similarly, a screen height below 1850mm allows overhead spray (from hand showers or drenchers) to arc over the top.
3. The floor is completely flat, with no slope towards the drain. Level‑access showers are often misinterpreted as “perfectly level”. In fact, they must have a subtle fall (1:60 to 1:80) to channel water into the waste. Without that gradient, water pools in the centre, then spreads horizontally towards the lowest point – which is often the open entrance. Pooling water also increases slip risks, especially for elderly or disabled users.
4. Water pressure is too high, causing excessive bounce and rebound. Pressures above 3 bar in a combi system can produce aggressive spray that ricochets off the user’s body and the back wall. A 10‑litre‑per‑minute flow at 3 bar will send droplets flying sideways in every direction – far beyond the reach of a standard glass screen.
5. No physical barrier (like a flipper panel) to interrupt sideways spray. Even with a correctly sized screen, water can travel laterally off shoulders, elbows, or a handheld shower. Without a hinged return panel or a carefully placed bath mat, that lateral spray lands directly on the bathroom floor.
6. The drain is poorly positioned or incorrectly specified. A point drain located under the shower head is ineffective if the floor slope directs water away from it. A linear drain placed along the back wall or the entrance threshold is far more effective for doorless layouts, as it captures water across a wide channel.
The key takeaway? A walk‑in shower splashes not because the concept is flawed, but because one or more of these six failures is present. The good news is that every single one can be corrected at the design stage – or retrofitted with moderate effort. The following six solutions directly address each of these root causes.
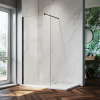
Solution 1 – Glass Screen Length: Why 1200‑1500mm Is the Minimum for Splash Control
The single most important component of a splash‑free walk‑in shower is the fixed glass screen. In the UK, many homeowners mistakenly buy a 900mm or 1000mm panel, leaving the rest of the tray completely open. That is a recipe for water on the floor.
The industry‑proven rule of thumb is simple: use a glass screen that is at least 1200mm long, and ideally 1500mm if your tray depth allows it. How do you calculate this? Leave approximately 550‑600mm for the walk‑through opening, and use the remaining tray length for the fixed screen.
For example, on a 1200 × 800mm shower tray, you would install an 800mm fixed screen, leaving a 400mm opening – that is too tight for comfort. Instead, choose a 1400 × 900mm tray. Install a 1200mm screen (running along the 1400mm side), which leaves a comfortable 500‑600mm opening at the front. That opening is wide enough to step through easily, while the 1200mm screen blocks the vast majority of splashed water.
UK installers at Elegant Showers and Beams Renovation consistently recommend 8mm toughened safety glass with an easy‑clean coating (e.g. EnduroShield or CleanCoat) to prevent limescale build‑up. The glass height should be 1850‑2000mm – anything shorter allows overhead splash to escape.
Key takeaway: Long glass screen (1200‑1500mm) + short opening (550‑600mm) = splash containment.
Solution 2 – Shower Head Position: How to Keep Water Away from the Walk‑In Opening
You can have the longest glass screen in the world, but if your shower head fires water directly at the open entrance, you will still get splashing. Shower head position is critical.
The golden rule: mount the shower head on the wall farthest from the opening, or on a perpendicular side wall that directs water towards the back of the enclosure. Never place the shower head directly opposite the walk‑through gap.
Best options for doorless walk‑in showers:
-
Ceiling‑mounted rainfall heads – water falls straight down, creating almost no lateral spray.
-
Wall‑mounted heads on the rear wall – angled slightly inward, away from the entrance.
-
Adjustable hand showers on a rail – can be clipped at a height of 200cm and aimed towards the back corner.
UK building regulations do not mandate a specific shower head position, but BS EN 14428 (shower enclosure standards) implies that the spray pattern must be contained within the wet area. A simple test: stand in your planned shower space and imagine the spray cone. If that cone extends beyond the glass screen towards the opening, reposition the head.
Pro tip from AHM Installations: Fit a thermostatic shower valve and use lower flow rates (e.g. 8‑10 litres per minute) to reduce splash force.
Solution 3 – Floor Slope Gradient: The Critical 1:60‑1:80 Fall That Keeps Water Draining
Even if you contain the spray, water will eventually land on the shower floor. If that floor is completely flat, the water will spread sideways – including towards the open entrance. A floor slope to the drain is your silent, passive hero.
The British Standard BS 5385‑4:2015 (which covers the installation of ceramic and stone tiles in wet areas) recommends a fall of between 1:80 and 1:35 within the shower zone. For doorless walk‑in showers, the ideal gradient is 1:60 to 1:80 – that is a 1mm drop for every 60‑80mm of horizontal distance.
How to achieve this:
-
Use pre‑formed floor formers (e.g. Impey Aqua‑Dec, Wedi Fundo, Schluter Kerdi‑Shower) – these provide a factory‑made, fail‑safe gradient.
-
Alternatively, a wet‑bed mortar screed can be sloped manually by a skilled tiler.
-
Linear drains (slot drains) are superior to point drains because they allow a single‑plane slope, making tiling easier and water capture more efficient.
A correctly sloped floor channels water directly into the drain in seconds, leaving no standing water to creep out of the opening. Without this slope, you will have puddles, slip hazards, and inevitable overspill.
Solution 4 – Low‑Profile Shower Trays: The Benefits for Splash Containment
A low‑profile shower tray (also called a slimline or level‑access tray) offers two major advantages: it provides a subtle physical barrier against water creep, and it makes the shower look seamless.
Standard low‑profile trays have a step‑in height of 25‑40mm. That tiny threshold – no more than the height of two £1 coins – is enough to act as a psychological and hydraulic dam. Water that reaches the edge of the tray must climb that 25mm lip to escape. With a good floor slope, very little water ever reaches that lip.
What to look for in a low‑profile tray for splash prevention:
-
Stone resin or mineral marble construction (solid, non‑flexible, quiet underfoot)
-
Anti‑slip surface (R10 or R11 slip rating)
-
Integrated drying area – a slightly raised section near the opening where you can step off without dripping
-
UK standard sizes: 1200×800, 1200×900, 1400×800, 1400×900, 1500×900
Important note: A low‑profile tray is not a flat tray. It must still have its own built‑in fall (typically 1:50 to 1:80) towards the waste outlet. Many UK manufacturers like MX, Kaldewei, and Merlyn offer trays with both low thresholds and correct gradients.
Practical Fixes: Bath Mats for Slip Protection + Flipper Panels for Extra Spray Defence
Even with excellent design, some homeowners want an extra layer of security. Two simple, affordable additions can make a noticeable difference.
Bath Mats for Walk‑In Showers: Non‑Slip Safety and Water Absorption
A non‑slip bath mat does two jobs. First, it provides extra grip on a wet tray surface – particularly valuable for elderly users or children. Second, a mat placed near the opening can absorb the last few drops of splash.
For walk‑in showers, choose an extra‑long mat (e.g. 91cm) that covers the full width of the entrance. Look for:
-
Suction cups on the underside to prevent sliding.
-
Drainage holes or a slatted duckboard design – this allows water to pass through rather than pooling on the mat.
-
Mould‑resistant materials (rubber or treated bamboo).
Flipper Panels: Hinged Glass Returns That Fold Out for Shower Time
A flipper panel (also called a hinged return panel or swing panel) is a 300‑350mm wide piece of toughened glass attached to the fixed screen by piano hinges. During a shower, you swing it inward (up to 180°) to block the opening. After drying off, you fold it flat against the fixed screen, restoring the fully open look.
Flipper panels are especially popular in the UK for walk‑in showers that are slightly undersized (e.g. 1200×800mm tray). They provide targeted defence without compromising the doorless aesthetic. Many UK suppliers – including Kerol Hardware, Bath Center, and Roman Showers – offer flipper panels in chrome, matt black, brushed brass, and gunmetal finishes, often with a lifetime guarantee.
Installation tip: A flipper panel is most effective when the fixed glass screen is already 1200mm or longer. The flipper adds an extra 300mm of protection during use.
Walk‑In Shower Splash Prevention Checklist: 6 Steps to a Dry Bathroom Floor
Use this checklist before you finalise your bathroom plans:
-
☑ Glass screen length – Minimum 1200mm (ideally 1500mm) fixed panel. Opening left: 550‑600mm.
-
☑ Shower head position – Mounted on the wall farthest from the opening, or ceiling‑mounted rainfall.
-
☑ Floor slope – 1:60 to 1:80 gradient towards a linear drain (BS 5385‑4:2015 compliant).
-
☑ Low‑profile tray – 25‑40mm threshold, stone resin, anti‑slip surface, built‑in fall.
-
☑ Flipper panel – 300‑350mm hinged return for extra spray defence during showers.
-
☑ Bath mat – Non‑slip with drainage holes, placed at the opening.
Plan first, install second. The layout of your glass screen, shower head, drain, and tray must be decided together – not as separate afterthoughts.
Frequently Asked Questions About Walk‑In Shower Splashing
Do walk‑in showers splash everywhere?
Only if poorly designed. A walk‑in shower without a door is not inherently flawed – it simply requires careful attention to five key elements: glass screen length, shower head position, floor slope, tray selection, and supplementary barriers like flipper panels or bath mats. With a correctly specified setup (1200‑1500mm glass screen, 1:60‑1:80 floor gradient, linear drain, and head mounted away from the opening), a walk‑in shower can be virtually splash‑free. Many UK homeowners successfully operate doorless showers with no water escape whatsoever.
What is the minimum size for a UK walk‑in shower to avoid splashing?
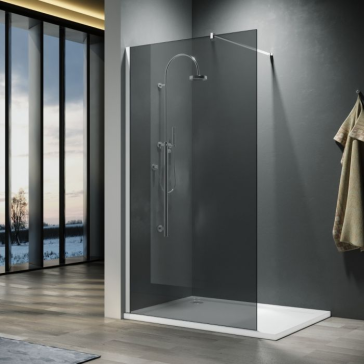
For a comfortable doorless walk‑in shower, aim for a tray size of at least 1200 × 800‑900mm. This provides sufficient depth to install a long fixed glass screen while leaving a practical 550‑600mm walk‑through opening. A 900 × 900mm tray can work with a door, but for a truly open design, anything smaller than 1200mm in depth risks persistent splash issues. If space is extremely tight (e.g. a 900mm square enclosure), consider a compact walk‑in shower with a bi‑fold door rather than a fully open design.
How much glass do I need to stop water splashing?
You need a fixed glass screen of at least 1200‑1500mm in length (running along the back wall). The rule of thumb is: measure the depth of your tray, subtract 550‑600mm for the opening, and the remainder is your minimum glass length. For example, on a 1500mm deep tray, a 900mm screen leaves a 600mm opening – acceptable. On a 1200mm tray, a 650mm screen leaves a 550mm opening – workable but snug. Glass height should be 1850‑2000mm to block overhead spray. Use 8mm toughened safety glass with an easy‑clean coating for durability and low maintenance.
Can a walk‑in shower be fully waterproof without a door?
Yes – absolutely. A doorless walk‑in shower relies on a combination of floor gradient, linear drainage, a low‑profile tray, and correctly positioned glass screening rather than a physical door seal. When installed correctly, water is guided by gravity to the drain before it can travel to the opening. The key difference is that a doorless shower is drainage‑dependent rather than seal‑dependent. Professional installers consistently deliver fully functional doorless enclosures that remain dry under normal use.
What is a flipper panel and does it help with splashing?
A flipper panel (also called a hinged return panel or swing panel) is a 300‑350mm wide piece of toughened glass attached to the fixed screen via piano hinges. During a shower, you swing it inward (up to 170‑180°) to block the opening, effectively reducing the walk‑through gap by 300‑350mm. After showering, it folds flat against the fixed screen, restoring the open look. Flipper panels are especially useful in installations where the fixed screen is at the lower end of the recommended range (e.g. 1200mm) or where the opening is wider than 600mm.
Conclusion: Yes, Walk‑In Showers Can Be Splash‑Free – With Intelligent Design
So, do walk‑in showers splash? Only when corners are cut. A doorless shower is not a compromise – it is an upgrade, if you respect the physics of water.
The six solutions in this guide (long glass screen, smart head placement, sloped floor, low‑profile tray, bath mat, and flipper panel) work together as a system. No single element can do the job alone. But when combined, they deliver a showering experience that is open, accessible, and – most importantly – dry.
Before your next bathroom project, run through the checklist. Consult a professional installer who understands wet‑room principles. And remember: the goal is not to trap water with a door, but to guide it back to the drain with intelligent design.
Ready to design your own splash‑free walk‑in shower? Visit Elegant Showers for expert advice, high‑quality glass screens, flipper panels, low‑profile trays, and complete walk‑in shower solutions. Browse our extensive range of UK‑sized enclosures, download product specifications, and get inspiration for your next bathroom renovation.

Validate your login